
Are you curious about the colorful gauges and dials on an analog multimeter tester? If you’ve ever wondered how to measure voltage, current, or resistance with one, you’re in the right place.
Imagine having the power to troubleshoot electrical issues in your home or car, ensuring everything is running smoothly. This guide will walk you through the steps of using an analog multimeter tester, so you can confidently tackle those electrical mysteries.
With easy-to-follow instructions, you’ll discover how to make your multimeter a trusty tool in your kit. Ready to unlock its secrets and empower your DIY skills? Let’s dive in!

Credit: www.allaboutcircuits.com
Choosing The Right Analog Multimeter
Choosing the right analog multimeter is crucial for accurate measurements. A suitable multimeter ensures reliable data, helping you diagnose electrical issues effectively. With various options available, selecting the perfect one may seem daunting. But understanding the types and features simplifies the process.
Types Of Analog Multimeters
Analog multimeters come in different types. Basic models measure voltage, current, and resistance. Advanced versions offer more functionalities like capacitance and frequency measurement. Choose a type based on your specific needs.
Features To Consider
Consider essential features before purchasing an analog multimeter. Ensure it has a clear, easy-to-read display. Look for a durable design that withstands regular use. Accuracy is vital for precise readings. Check the sensitivity of the device for varied measurements. Some models offer overload protection, safeguarding the device from high currents.
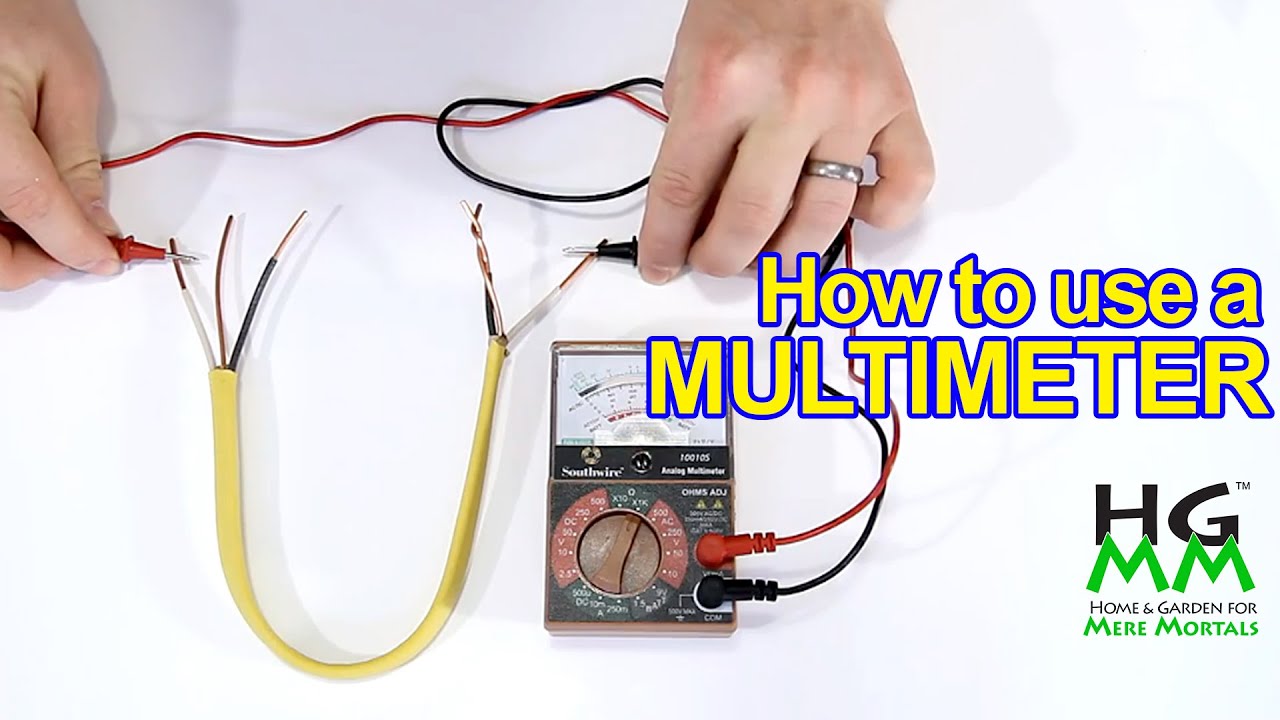
Credit: m.youtube.com
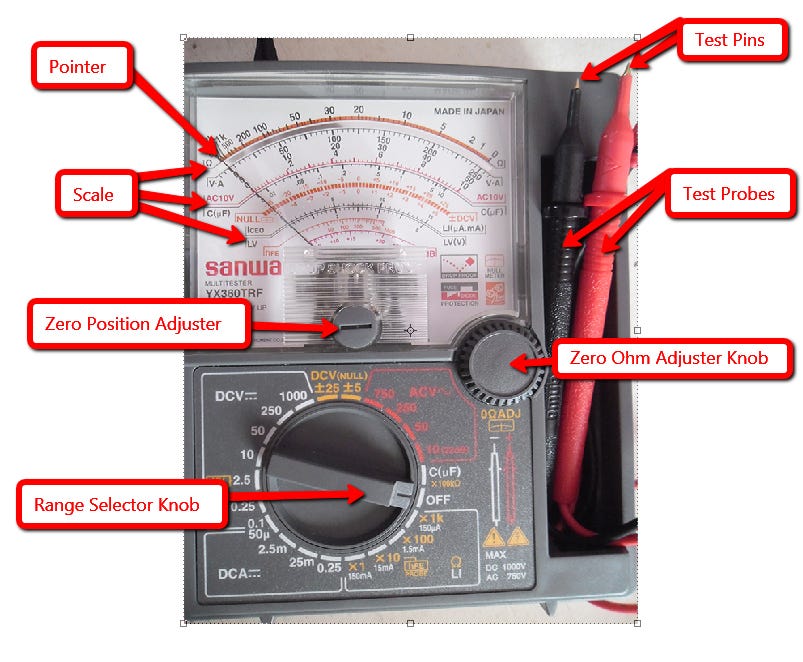
Understanding The Multimeter Components
Before using an analog multimeter, know its main components. Each part plays a crucial role in measurement. Learning these basics helps avoid mistakes and ensures accurate readings. Let’s break down each component.
Dial And Range Selector
The dial is the multimeter’s control center. It allows you to select the type of measurement. Choose between voltage, current, and resistance. The range selector adjusts the sensitivity. Set it according to your measurement needs. This ensures precise readings without damaging the device.
Probes And Leads
Probes and leads connect the multimeter to the device being tested. The red lead is positive. The black lead is negative or ground. Attach them correctly for accurate results. Always inspect leads for damage before use. Faulty leads can lead to incorrect readings or device damage.
Display And Scale
The display shows the measurement results. Analog multimeters have a needle that points to a scale. Each scale corresponds to different measurements. Read the scale that matches your chosen measurement type. Understanding the scale ensures you interpret results correctly.
Preparing For Measurement
Getting ready to use an analog multimeter is important. Understanding its use ensures accurate readings. Follow these steps to prepare your multimeter for measurement. This guide will help keep you safe and your device accurate.
Safety Precautions
Safety comes first with any electrical tool. Always check your multimeter for damage. Inspect the probes and wires for cracks. Never use a broken multimeter. Wear rubber gloves for extra protection. Avoid measuring wet or humid areas. Keep your hands dry. Turn off circuits before connecting the multimeter.
Calibrating The Multimeter
Calibrating your multimeter ensures accurate readings. Begin by setting the scale to zero. Turn the dial to the lowest setting. Adjust the needle to zero using the calibration screw. Test the multimeter with a known source. For example, measure a fresh battery. Ensure the reading matches the battery’s voltage. This confirms accurate calibration.
Measuring Voltage
Measuring voltage is one of the most crucial tasks when using an analog multimeter tester. Whether you’re a hobbyist tinkering with electronics or a professional troubleshooting circuits, understanding how to measure voltage accurately is essential. As you dive into the world of voltage measurement, you’ll find that it’s surprisingly straightforward and immensely rewarding. Imagine the thrill of watching that needle move as you discover how electricity flows through your devices!
Ac Voltage Measurement
Start by ensuring your multimeter is set to measure AC voltage. Typically, this involves adjusting the dial to the ‘V~’ setting. AC voltage is what powers our homes and appliances. So, when you’re testing a wall socket or an appliance, this is the setting you’ll use.
Before you proceed, check the maximum voltage rating on your multimeter. You want to ensure it can handle the voltage you’re measuring. Overloading it could damage your device. Make sure the probes are correctly inserted into the multimeter. The black probe goes into the common (COM) port, and the red probe goes into the voltage (V) port.
Now, touch the probes to the points where you want to measure voltage. Always start with the black probe on the ground or neutral point. Then, place the red probe on the live point. Watch the needle swing to give you the voltage reading. It’s a simple yet powerful way to check if your electrical system is functioning properly.
Dc Voltage Measurement
Switch the dial to the DC voltage setting, often marked as ‘V-‘ or ‘DCV’. DC voltage is common in batteries and many electronic devices. As you measure, ask yourself, how often do you check if your batteries are still good?
Insert the probes just like you did for AC voltage. The red probe goes into the voltage port, while the black one goes into the common port. DC voltage measurement requires attention to polarity. Connect the black probe to the negative terminal and the red probe to the positive terminal.
Watch the multimeter needle as it moves to show the voltage level. If you see a negative reading, it means the probes are reversed. Correct the connection and measure again. This step helps you identify whether your batteries are charged or need replacement.
Measuring voltage with an analog multimeter is not just about numbers; it’s about understanding the heartbeat of your electronic devices. Are you ready to master this skill and troubleshoot like a pro?
Measuring Current
Understanding how to measure current with an analog multimeter can be a game-changer in your DIY electrical projects. Whether you’re a hobbyist tinkering with electronics or a professional electrician, grasping this skill can enhance your troubleshooting abilities. The key is knowing how to set up the multimeter correctly and interpret its readings. Are you ready to dive into the practical world of current measurement?
Ac Current Measurement
Measuring AC current with an analog multimeter requires you to ensure the meter is set to the correct range. Start by turning the dial to the AC setting. Look for a symbol that resembles a wave; this represents AC.
Next, connect the probes to the circuit you’re testing. Always start with the black probe in the common (COM) socket, and the red probe in the socket marked for current measurements, usually denoted with an “A”. Have you checked if your multimeter can handle the expected current range?
Once connected, observe the needle on the scale. The needle’s movement indicates the current flowing through the circuit. Make sure to read the scale carefully—it’s easy to misinterpret the value if you’re unfamiliar with the multimeter’s markings.
Dc Current Measurement
Switching to DC current measurement involves setting the dial to the DC setting. Look for a straight line symbol, which represents DC. This step is crucial to ensure accurate readings.
Connect the probes as you did for AC measurement: black to COM and red to the current measuring socket. When dealing with DC, ensure the polarity is correct. Have you ever experienced a reversed connection? It can lead to inaccurate readings or even damage the meter.
Watch the needle move across the scale to find the current value. DC current readings require careful attention to the meter’s scale, as the difference in readings can be subtle. It’s fascinating how a tiny deflection can unveil so much about your circuit!
Using an analog multimeter for current measurement is both straightforward and insightful. As you practice, you’ll gain confidence in interpreting the readings and understand the nuances of your electrical projects. So, what are you waiting for? Grab your multimeter and start exploring the currents in your circuits!
Measuring Resistance
Utilizing an analog multimeter tester involves connecting the probes to the circuit. Set the dial to the resistance setting. The needle indicates resistance value, providing a straightforward way to measure electrical resistance efficiently.
Measuring resistance with an analog multimeter tester is a fundamental skill for anyone interested in electronics or DIY projects. Whether you’re troubleshooting a circuit or checking a component, understanding resistance is crucial. This process might seem daunting at first, but with a few simple steps, you can easily get the hang of it. Let’s dive into how you can measure resistance accurately using an analog multimeter.
Zeroing The Meter
Before you start measuring resistance, it’s essential to zero your meter. This step ensures that your readings are accurate. Begin by setting your multimeter to the ohms (Ω) setting. You’ll notice a knob or switch that allows you to select the resistance scale. Next, touch the two probes together. The needle on your multimeter should move towards zero. If it doesn’t, you’ll need to adjust the zero adjust knob until the needle aligns with the zero mark on the scale. This step is critical because it compensates for any internal resistance in the meter or probes. Have you ever skipped zeroing the meter and ended up with inaccurate readings? It’s a common mistake, and one that can easily be avoided by taking a few extra seconds to zero your device.
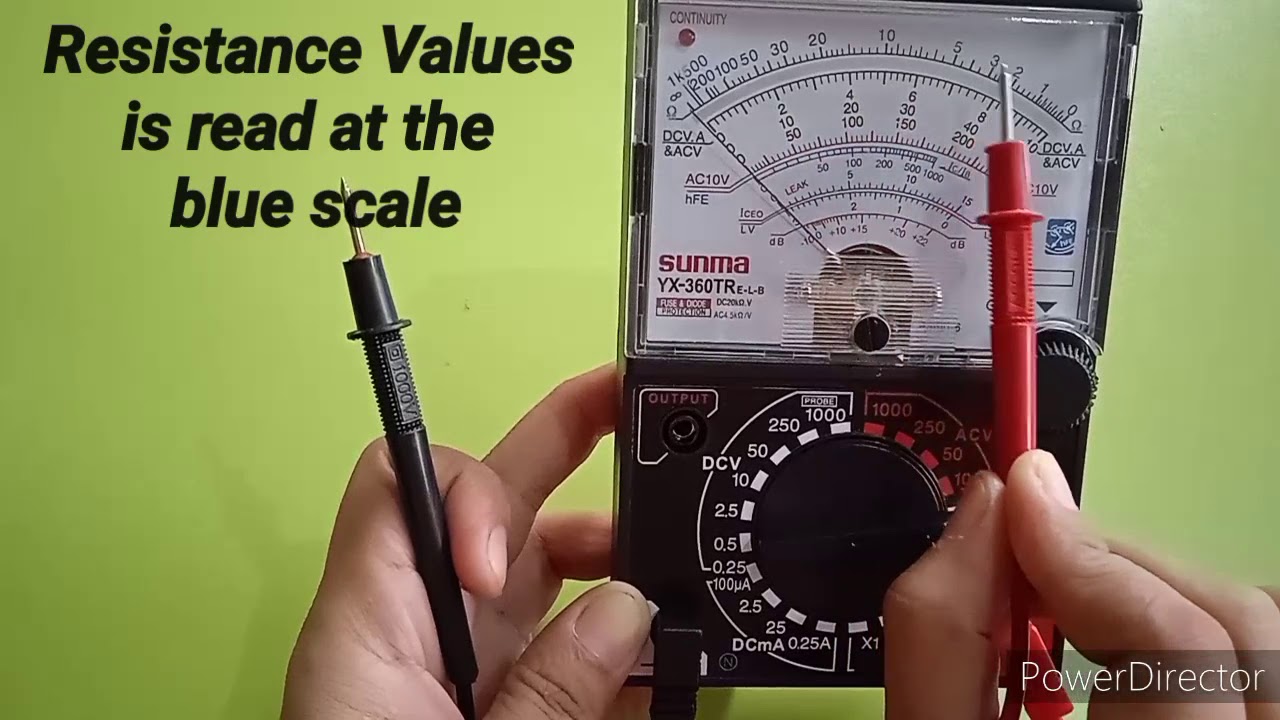
Reading The Resistance Scale
Once your meter is zeroed, you’re ready to measure resistance. Connect the probes across the component or circuit you want to measure. Make sure the circuit is powered off to avoid damage to the multimeter or inaccurate readings. Observe the needle on the resistance scale. The scale is typically marked with different resistance values, and the needle’s position indicates the resistance of the component. If the needle doesn’t move, try adjusting the range to a higher setting. Reading the resistance scale can be tricky at first, but practice makes perfect. Have you tried reading the scale and found it confusing? Remember, patience and practice are key. With time, you’ll become more adept at interpreting the needle’s position. In summary, measuring resistance with an analog multimeter involves zeroing the meter and carefully reading the resistance scale. These are simple yet crucial steps that ensure accuracy in your measurements. Whether you’re a hobbyist or a professional, mastering this process can save you a lot of time and trouble in your projects. Give it a try, and see how it enhances your understanding of electronics!
Troubleshooting Common Issues
Whether you’re a seasoned DIY enthusiast or just starting out, using an analog multimeter tester can be a bit tricky. Troubleshooting common issues is a key skill to ensure accurate measurements and safe operations. Let’s explore some typical problems you might encounter and how to address them effectively.
Inaccurate Readings
Getting inaccurate readings can be frustrating, especially when you rely on precise data. Start by ensuring that your multimeter is properly calibrated. Calibration errors often lead to skewed results.
Check the battery level, too. A low battery can cause the needle to drift, leading to unreliable readings. Replace it if necessary.
Consider your environment. Extreme temperatures and electromagnetic interference can also affect accuracy. Measuring in a stable, interference-free environment can make a big difference.
Faulty Probes
Faulty probes can wreak havoc on your measurements. Inspect them for visible damage like cracks or frayed wires. Even minor damage can cause connectivity issues.
Test the probes with known resistors to verify their functionality. If the readings are off, replacing the probes might be your best bet.
Keep in mind that dirty or corroded probe tips can impact the connection. Clean them with rubbing alcohol and ensure they’re securely connected to the multimeter.
Have you ever encountered these issues while using your analog multimeter? Remember, troubleshooting these common problems not only saves you time but also enhances your skills and confidence. What’s your go-to strategy for solving these glitches?
Credit: www.youtube.com
Maintaining Your Analog Multimeter
Keeping your analog multimeter in good condition is essential. It ensures accurate readings and prolongs its lifespan. Regular maintenance helps avoid costly repairs. Proper care includes cleaning, storage, and battery replacement.
Cleaning And Storage
Dust and dirt can affect your multimeter’s performance. Clean it regularly with a soft, dry cloth. Avoid using water or harsh chemicals. These can damage sensitive parts. Store your multimeter in a dry place. A protective case is ideal. It shields against moisture and physical damage.
Replacing The Battery
A weak battery leads to inaccurate readings. Change it every few months. Open the battery compartment carefully. Use the correct battery type as specified. Dispose of old batteries properly. This prevents environmental harm.
Frequently Asked Questions
How Do I Measure Voltage With A Multimeter?
To measure voltage, set the multimeter to the AC or DC voltage range. Connect the probes to the circuit’s points. Read the displayed value for voltage. Ensure the correct range to avoid errors.
What Is The Function Of The Multimeter Dial?
The multimeter dial selects the measurement type and range. Choose the correct setting for voltage, current, or resistance. Turning the dial adjusts sensitivity and precision. Proper selection is crucial for accurate readings.
How Do I Test Continuity With A Multimeter?
Set the multimeter to the continuity setting. Touch the probes to the circuit’s ends. A beep indicates continuity. Ensure the circuit is de-energized before testing. This helps identify broken connections.
Can I Measure Current With An Analog Multimeter?
Yes, you can measure current. Set the dial to the current range. Connect the probes in series with the circuit. Observe the needle’s deflection for current reading. Ensure the circuit is powered and probes are securely attached.
Conclusion
Learning to use an analog multimeter tester is essential for DIY projects. It helps in measuring voltage, current, and resistance accurately. Practice regularly to become confident and efficient. Always ensure safety by disconnecting power before testing. Follow the manual for your specific multimeter model.
Start with simple measurements and gradually try more complex ones. This tool is a valuable addition to your toolkit. With patience and practice, you’ll get reliable results. Remember, understanding your multimeter improves your troubleshooting skills. Happy testing!


