
Christmas is a magical time of year, filled with twinkling lights and festive decorations. But nothing puts a damper on your holiday spirit quite like a string of Christmas lights that won’t light up.
You’ve probably been there, frustrated and jiggling wires to no avail. What if there was a simple way to diagnose and fix the problem? Enter the multimeter, a handy tool that can help you troubleshoot those pesky lights with precision.
In this guide, you’re about to discover how to use a multimeter to bring your Christmas lights back to life. Imagine the satisfaction of solving this common holiday headache with ease! Read on, and you’ll be the holiday hero who saves the day with just a few simple steps.
Essential Tools For Troubleshooting
Christmas lights bring joy, but faulty ones cause frustration. Solving issues with these lights doesn’t require many tools. A multimeter stands out as the most valuable tool. It helps locate problems in the wires or bulbs. Having the right tools ensures quick and efficient repairs. Let’s explore the essential tools needed for this task.
1. Understanding The Multimeter
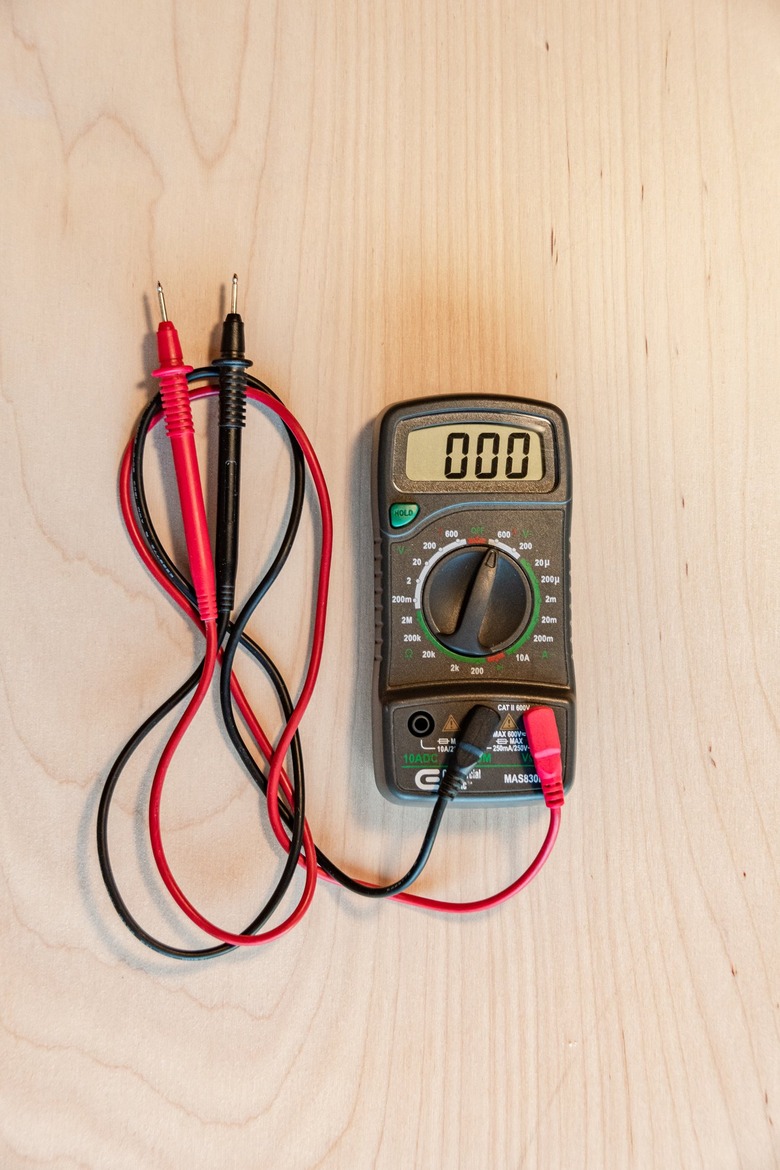
The multimeter is a must-have tool. It measures voltage, current, and resistance. Knowing how to use it simplifies troubleshooting Christmas lights. Set the multimeter to the correct setting for what you need to measure. Follow the multimeter instructions for accurate readings.
2. Wire Cutters And Strippers
Wire cutters and strippers are crucial. They help remove damaged sections of the wire. Wire strippers ensure clean cuts without damaging the core. Properly stripped wires guarantee a good connection. Always handle these tools carefully.
3. Replacement Fuses And Bulbs
Having spare fuses and bulbs saves time. Faulty fuses often cause lights to stop working. Swap them out to restore power. Bulbs may burn out over time. Keep replacements handy for quick fixes.
4. Electrical Tape
Electrical tape protects exposed wires. It prevents short circuits and keeps connections secure. Wrap it around any open sections. This simple tool ensures safety and functionality.
Credit: www.hunker.com
Safety Precautions
Using a multimeter to troubleshoot Christmas lights can be practical. Yet, safety should always come first. Electricity can be dangerous if handled carelessly. Taking proper precautions is crucial to avoid accidents. Here’s a guide on essential safety measures.
Inspect Your Multimeter
Before using the multimeter, check for any damage. Ensure the probes and wires are intact. Damaged tools can lead to errors or accidents.
Turn Off Power Source
Always unplug the Christmas lights before testing. Live wires pose a shock risk. Ensure the power source is completely off.
Wear Protective Gear
Use rubber gloves when handling electrical items. They reduce the risk of electric shocks. Eye protection is also advisable.
Work In A Dry Environment
Moisture increases the risk of electrical shocks. Make sure your working area is dry. Avoid troubleshooting lights in wet conditions.
Follow Multimeter Instructions
Read and follow the multimeter’s user manual carefully. Different models have specific guidelines. Understanding them ensures accurate readings.
Keep Children And Pets Away
Ensure the area is clear of children and pets. They might accidentally interfere with your work. Their safety is paramount.
Double-check Connections
Ensure all connections are secure before testing. Loose connections can cause incorrect readings. They might also lead to short circuits.
Dispose Of Damaged Lights Properly
If you find damaged lights, dispose of them safely. Do not attempt to repair broken wires. It’s safer to replace them.
Multimeter Basics
Discover how a multimeter can help fix Christmas lights. Identify broken bulbs or faulty wires easily. Learn simple steps to ensure your holiday decorations shine brightly.
When the holiday season approaches, there’s nothing more frustrating than a string of Christmas lights that suddenly decides not to shine. A multimeter, a handy tool for troubleshooting electrical issues, can help you identify the problem quickly. Understanding how to use a multimeter effectively can save you time and keep your festive spirit intact. Let’s dive into the basics of using a multimeter for your Christmas light troubleshooting.
Understanding Functions
A multimeter is like a Swiss Army knife for electrical diagnostics. It can measure voltage, current, and resistance, among other things. The most commonly used functions for Christmas light troubleshooting are voltage and continuity. Voltage helps you find where the electricity stops flowing. Continuity checks if the electrical path is complete. If you’re unfamiliar with these terms, don’t worry. Imagine using a flashlight to find a hidden path—the multimeter is your flashlight.
Setting The Multimeter
Before you start, ensure your multimeter is set correctly. This is crucial for accurate readings and safety. First, insert the black probe into the “COM” port and the red probe into the “VΩ” port. To check voltage, turn the dial to the AC voltage setting. Christmas lights usually operate on AC power. If you’re checking continuity, switch the dial to the continuity symbol, which looks like a sound wave. When I first used a multimeter, I was unsure about the settings. But once I set it correctly, it was like having a map to navigate the tangled web of lights. Have you ever considered how much easier your life could be with the right tools? A multimeter might just be the friend you need this holiday season.
Identifying Common Issues
Identifying common issues with Christmas lights can be tricky. Many people face problems like burnt out bulbs, faulty wiring, and blown fuses. Using a multimeter can help solve these issues easily. This tool helps pinpoint the problem, saving time and effort.
Burnt Out Bulbs
Burnt out bulbs are a frequent issue. They can cause a whole section of lights to go dark. To identify them, use the multimeter to check the bulbs’ continuity. Place the probes on the bulb’s terminals. If the multimeter shows no reading, the bulb is burnt out.
Faulty Wiring
Faulty wiring often disrupts the light string. Check for broken or frayed wires. Use the multimeter to test the wire’s continuity. Place probes on each end of the wire. A lack of reading indicates a wiring problem. It’s crucial to replace or repair damaged wires.
Blown Fuses
Blown fuses stop lights from working. To check fuses, remove them from the plug. Use the multimeter to test for continuity. If there’s no reading, the fuse is blown. Replace it with a new one of the same rating.
Testing Bulbs With A Multimeter
Testing Christmas light bulbs with a multimeter can save you time and frustration during the holiday season. Imagine having your lights up and ready, only to find a section not working. Instead of wasting hours figuring out which bulb is faulty, a multimeter simplifies the process. This handy tool can quickly identify the problematic bulb, allowing you to replace it and enjoy your festive decorations.
Checking For Continuity
Continuity testing ensures electricity flows through the bulb. Set your multimeter to the continuity setting. Touch the multimeter probes to the bulb’s metal contacts. If the multimeter beeps or shows a reading, the bulb is good. No sound or reading means the bulb is faulty. It’s a straightforward process that saves you from checking each bulb manually.
Think about it: how much easier would it be to fix your lights if you knew exactly which bulb to replace? A multimeter does just that, pinpointing the issue in seconds.
Replacing Burnt Out Bulbs
Once you’ve identified a burnt-out bulb, replacing it is the next step. Have spare bulbs ready. Remove the faulty bulb by gently twisting it out. Insert the new bulb by aligning its pins with the socket. Ensure it’s secure to avoid loose connections.
Having spare bulbs is a game changer. Stock up before the holiday season so you’re prepared for quick fixes. This not only saves time but also keeps the festive spirit alive without interruptions.
Ever spent hours untangling strings only to find a single burnt bulb? With a multimeter, that experience becomes a thing of the past. Consider investing in one to make your holiday troubleshooting hassle-free.
What other holiday hacks have saved you time during the season? Share your experiences and let’s keep the lights shining bright together!
Credit: www.hunker.com
Checking Wires And Connections
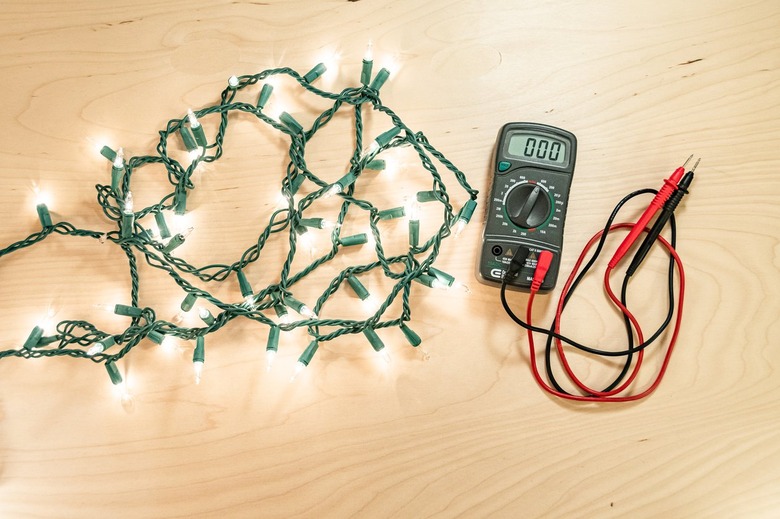
Your Christmas lights are not working. Don’t panic. The problem might be in the wires or connections. A simple check can often solve the issue. You’ll need a multimeter. It’s a tool that measures electrical current. Follow these steps to inspect your lights.
Inspecting For Damage
First, unplug your lights. Look at each wire closely. Are there any cuts or frays? Damaged wires can stop lights from working. Replace any damaged wires. Also, check the bulbs. Loose or broken bulbs can cause problems. Tighten any loose bulbs gently.
Testing For Open Circuits
Use your multimeter to test for open circuits. Set it to the continuity setting. Touch the probes to each end of a wire. If the multimeter beeps, the circuit is complete. No sound means an open circuit. Replace or fix any faulty wires.
Assessing Fuses And Their Replacements
Christmas lights bring warmth and joy to the holiday season. Yet, they can be a source of frustration when they malfunction. One common issue involves the fuses. Understanding how to assess and replace these fuses helps ensure your lights stay shining bright. A multimeter is a handy tool for this task. It lets you test and identify faulty fuses. This guide will walk you through assessing fuses and finding suitable replacements.
Locating The Fuse
Start by unplugging the Christmas lights. Safety first. Then, locate the plug or adapter. Most fuses hide there. Usually in a small compartment. Open the cover gently with a screwdriver. Once open, you will see the fuses. Typically, there are two. Small, cylindrical, and glass-encased. Keep them safe for testing.
Testing Fuse Integrity
Set your multimeter to the continuity setting. Place one probe on each end of the fuse. Listen for a beep. A beep means the fuse is good. No sound? The fuse is likely blown. Check each fuse this way. Testing ensures you replace only the faulty ones. It saves both time and effort.
Preventing Future Issues
Christmas lights are a staple of holiday decor. Keeping them in perfect working order ensures a festive atmosphere. To avoid future issues, proper care and maintenance are essential. By implementing preventative measures, you can extend the lifespan of your lights. This saves money and reduces hassle.
Proper Storage Techniques
Storing lights carefully prevents damage. Wrap each strand around a spool or cardboard. This keeps cords untangled and safe. Place lights in a dry, cool space. Moisture and heat can damage wires. Use a plastic container for storage. This protects against pests and dust.
Regular Maintenance Tips
Inspect lights regularly to spot issues early. Check for frayed wires or cracked bulbs. Replace damaged parts immediately. Clean bulbs gently with a soft cloth. Dust can affect brightness. Test lights before each season. Ensure all bulbs light up correctly.

Credit: www.youtube.com
Frequently Asked Questions
How Do I Test Christmas Lights With A Multimeter?
To test Christmas lights with a multimeter, set it to the continuity setting. Touch the probes to each bulb’s contact points. If the multimeter beeps, the bulb is functional. This method helps identify faulty bulbs quickly, ensuring your lights shine brightly throughout the festive season.
Can A Multimeter Detect Faulty Christmas Lights?
Yes, a multimeter can detect faulty Christmas lights effectively. Set the multimeter to the resistance or continuity setting. Touch the probes to the wire or bulb contacts. A lack of signal or beep indicates a fault. This tool is vital for diagnosing and fixing light issues efficiently.
What Setting To Use On A Multimeter For Lights?
Use the continuity or resistance setting on a multimeter for testing lights. The continuity setting checks for a complete circuit, indicating functioning bulbs. The resistance setting measures electrical flow. Both settings help identify issues in Christmas lights, ensuring your decorations remain vibrant and functional.
Why Are My Christmas Lights Not Working?
Christmas lights may not work due to faulty bulbs, broken wires, or poor connections. Using a multimeter helps pinpoint these issues. Check each bulb and wire for continuity. Replace any defective components promptly to restore your lights’ functionality and keep your holiday decorations bright.
Conclusion
Troubleshooting Christmas lights can be simple with a multimeter. Just follow the steps and check each bulb. Pay attention to voltage and continuity. Handle bulbs with care to avoid damage. A multimeter is a handy tool for testing connections. It helps pinpoint the problem quickly.
No need to replace the whole strand. Fixing lights saves money and time. Keep your holidays bright and stress-free. Enjoy the festive season with working lights. Happy holidays and glowing decorations!


