
Are you ready to tackle your next DIY project but feeling stuck on how to properly equip your Ryobi circular saw with a new blade? You’re not alone.
Many DIY enthusiasts face this challenge, but it’s simpler than you might think. By learning how to correctly put a blade on your Ryobi circular saw, you not only ensure your safety but also enhance the efficiency of your work.
Imagine the satisfaction of cutting through materials with precision and ease, knowing your saw is set up perfectly. Keep reading to discover a step-by-step guide that will empower you to handle your circular saw like a pro, saving you time and effort in the process.
Safety Precautions
Ensure your safety by disconnecting the power and wearing gloves before handling the blade. Secure the saw on a stable surface and use the correct wrench to tighten the blade, preventing accidents.
Safety precautions are crucial when handling power tools like the Ryobi Circular Saw. Ensuring safety not only protects you but also maintains the integrity of your equipment. Before starting any task, prioritize safety to prevent accidents and injuries. Below, find essential safety measures to follow while putting a blade on your saw.
Wearing Protective Gear
Always wear safety goggles to shield your eyes from flying debris. Gloves can protect your hands from sharp edges. Ensure your clothing is snug without loose ends. Loose clothing can get caught in the saw. Wear sturdy shoes to protect your feet from falling objects. Ear protection can minimize noise exposure. Safety is your first priority.
Unplugging The Saw
Always unplug the saw before changing the blade. This simple step prevents accidental startups. Double-check the power source before proceeding. Ensure the switch is off. It’s vital for your safety. Keep the plug visibly out of any socket. This visual reminder ensures you know the saw is inactive.

Credit: www.ifixit.com
Tools And Materials Needed
Changing the blade on your Ryobi circular saw is essential for smooth cuts. Knowing the right tools and materials will help you do it safely. This section covers what you need for the job.
Required Tools
First, gather the necessary tools. You’ll need a wrench or a hex key. Check your saw manual for the specific type. These help loosen and tighten the blade bolt. Have a pair of gloves ready. They protect your hands during the process. A clean cloth is useful too. Use it to wipe any debris around the blade area. It ensures a safe and clean blade change.
Replacement Blade Options
Choose the right replacement blade for your saw. Consider the material you plan to cut. For wood, a standard carbide-tipped blade works well. For metal, use a metal-cutting blade. Check the blade size. It should match your saw’s specifications. Look at the tooth count. More teeth mean smoother cuts. Fewer teeth work faster but rougher. Always ensure the blade fits your saw model. This guarantees optimal performance.
Removing The Old Blade
Removing the old blade from a Ryobi circular saw may seem daunting, but with the right steps, it becomes manageable. A precise removal process ensures safety and efficiency. Follow the steps to make the task easier.
Loosening The Blade Bolt
First, unplug the saw from its power source. This prevents accidental starts. Locate the blade bolt on the side of the saw. Use a wrench to turn it counterclockwise. This action loosens the bolt. Apply steady pressure to avoid slipping. If the bolt is tight, use a penetrating oil for assistance. Wait a few minutes for the oil to work.
Detaching The Blade
Once the bolt is loose, remove it completely. Keep it safe as it’s needed later. Gently pull the blade away from the saw. Ensure hands are away from sharp edges. Inspect the blade for wear and tear. This inspection helps decide if a new blade is needed. Place the old blade in a secure location.

Credit: www.youtube.com
Installing The New Blade
Changing the blade on a Ryobi circular saw requires precision and care. First, unplug the saw for safety. Use the blade wrench to loosen the blade bolt, then remove the old blade. Position the new blade, ensuring teeth face the correct direction, and tighten the bolt securely.
Installing a new blade on your Ryobi circular saw can seem intimidating, but it’s straightforward when broken down into steps. Whether you’re a seasoned DIY enthusiast or a weekend warrior, ensuring your saw has a sharp, correctly installed blade is crucial for efficient and safe cutting. Let’s dive into the specifics of getting that new blade in place with precision and ease.
Positioning The New Blade
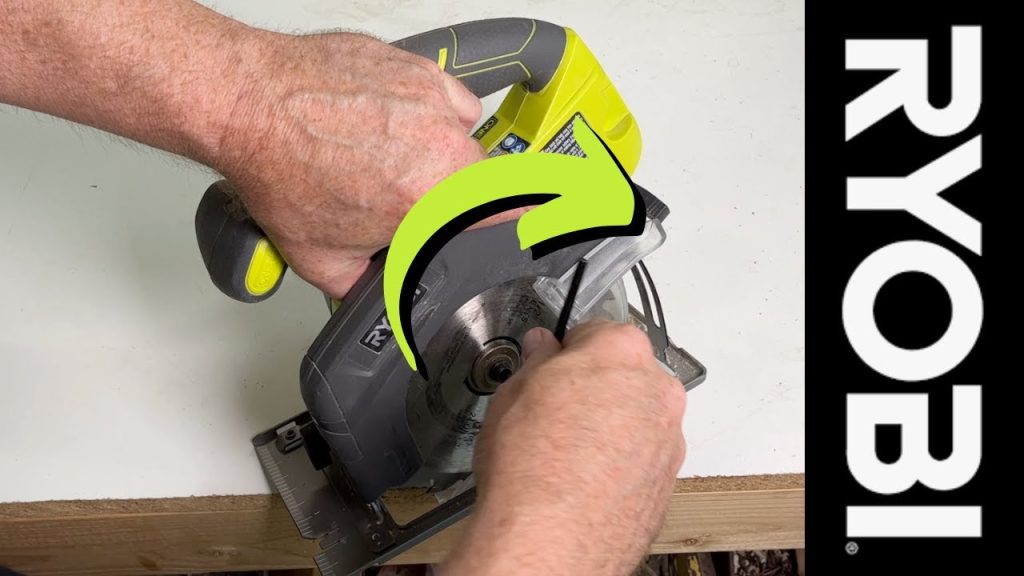
First, ensure your circular saw is unplugged for safety. Once that’s double-checked, gently lift the blade guard to expose the blade mount. This is your opportunity to inspect the area for any debris or dust that might have accumulated. Use a clean cloth to wipe it down, ensuring a perfect fit for the new blade. Next, align the new blade with the saw’s arbor. Pay attention to the direction of the blade’s teeth; they should face the same direction as the rotation of the saw. A common mistake is installing the blade backward, which compromises the saw’s efficiency and can be hazardous. Keep your focus sharp, and you’ll have the blade positioned perfectly.
Tightening The Blade Bolt
Once the new blade is positioned, it’s time to secure it. Insert the blade bolt through the center of the blade and into the arbor. Hand-tighten it initially to hold the blade in place. This step sets the stage for a safe and secure installation. With your saw’s wrench, tighten the bolt firmly, ensuring it’s snug but not overly tight. If you’re unsure about the tightness, remember that it’s better to check twice than risk a loose blade. A tight blade means smoother cuts and less vibration. Ever noticed how a loose bolt can affect your cut? Ensuring the bolt is tight prevents unnecessary wear and tear on your saw. Finally, lower the blade guard back into place. This step is essential for your safety and the longevity of your saw. Take a moment to admire your work; a well-installed blade is the foundation of any great cutting project. What project are you tackling next with your newly equipped saw?
Testing The Installation
Safely test the installation of a blade on your Ryobi circular saw to ensure it functions correctly. Confirm the blade is securely attached and spins smoothly without wobbling. This step is crucial for optimal performance and safety during use.
Testing the installation of a blade on your Ryobi circular saw is crucial for ensuring safety and precision in your cuts. This step isn’t just a formality; it can make the difference between a smooth, effortless cut and a jagged, frustrating mess. By taking a few moments to inspect the alignment and perform a test cut, you’ll confirm that your saw is ready for action. Let’s dive into how you can confidently test your installation.
Inspecting The Blade Alignment
Before you make any cuts, inspect the blade alignment thoroughly. Is the blade secured tightly without wobbling? A misaligned blade can lead to inaccurate cuts and even damage your saw. Look closely at the teeth of the blade. Are they pointing in the right direction? The direction matters for efficient cutting. Check the blade guard. Ensure it’s not obstructed and moves freely. It should protect you during operation without hindering the blade.
Performing A Test Cut
Once you’ve inspected the alignment, it’s time to make a test cut. Choose a piece of scrap wood that matches the type you plan to work with. It’s always better to test on a less valuable material first. Wear your safety goggles and ear protection. Safety gear is non-negotiable in woodworking. Turn on the saw and make a simple straight cut. Listen to the sound of the saw. Does it sound smooth or strained? A smooth sound indicates good blade installation. Examine the cut. Is it clean and straight? If not, you might need to recheck the blade alignment. Testing not only ensures your safety but enhances your craftsmanship. Are you ready to trust your saw with your next project, knowing it’s perfectly set up?
Troubleshooting Common Issues
Even after following instructions, issues can arise with your Ryobi circular saw. This can be frustrating, especially when you’re unsure of the cause. Understanding common problems helps solve them quickly and efficiently. Let’s explore two frequent issues: the blade not spinning and unusual noises.
Blade Not Spinning
If the blade is not spinning, check the power supply first. Ensure the saw is plugged in securely. Check the battery if it’s a cordless model. A loose or discharged battery can cause problems. Inspect the blade bolt. Make sure it’s tightened properly. A loose blade won’t spin. Examine the saw’s safety switch. It might be engaged, preventing movement. Lastly, check for debris around the blade. It can obstruct the blade’s path.
Unusual Noises
Unusual noises during operation often indicate a problem. Listen for grinding or rattling sounds. These might mean a loose blade. Stop the saw and tighten it immediately. Whining noises can signify a worn-out motor. This requires professional attention. Also, check for debris in the blade housing. It can cause strange sounds. Regular maintenance helps prevent these issues. Keep your saw clean and well-lubricated.
Maintenance Tips
Maintaining your Ryobi circular saw ensures smooth and safe operation. Regular maintenance extends the life of your tool and keeps your projects on track. Here are some essential maintenance tips to help you keep your circular saw in top shape.
Regular Cleaning
Regular cleaning prevents debris buildup and keeps your saw in peak condition. Always unplug the saw before cleaning. Use a soft brush to remove dust and particles from the blade and motor vents. Wipe the saw body with a damp cloth for a clean finish. Avoid using water directly on the tool to prevent damage.
Blade Storage
Proper blade storage extends the blade’s lifespan and maintains its sharpness. Store blades in a dry, cool place to avoid rust. Use blade covers or cases for added protection. Always store blades flat or hang them to prevent warping.

Credit: www.ifixit.com
Frequently Asked Questions
How To Attach Blade To Circular Saw?
Unplug the circular saw and remove the blade guard. Use a wrench to loosen the arbor nut. Position the new blade, ensuring teeth face forward. Tighten the arbor nut securely. Reattach the blade guard before use. Always follow the manufacturer’s instructions for safety.
Which Way Should A Blade Be Installed On A Circular Saw?
Install the blade with the teeth facing the front of the saw. Ensure the rotation arrow matches the saw’s direction.
How Do You Set The Blade On A Circular Saw?
First, unplug the saw for safety. Adjust the blade depth using the lever or knob. Ensure the blade depth matches the material thickness. Align the blade perpendicular to the base plate. Tighten the blade securely with a wrench. Always double-check the settings before use.
Which Way To Loosen A Nut On A Circular Saw?
Loosen a nut on a circular saw by turning it counterclockwise. Use a wrench for better grip and control. Ensure the saw is unplugged to prevent accidents. Wear safety gloves to protect your hands while loosening the nut.
Conclusion
Changing a Ryobi circular saw blade is simple and quick. Start by gathering your tools and ensuring safety. Remember to unplug the saw before beginning. Follow each step carefully for a smooth process. Tighten the new blade securely for optimal performance.
Regular maintenance extends the life of your saw. Practice these steps until you’re confident. A well-maintained saw boosts efficiency and precision. Enjoy your woodworking projects with confidence. Keep this guide handy for future reference. Happy sawing!


