
Imagine walking into your workspace and instantly finding the exact tool you need. No more rummaging through cluttered drawers or wasting time searching for misplaced items.
Organizing tools on a pegboard can transform your chaos into clarity, making your work more efficient and enjoyable. Whether you’re a seasoned DIY enthusiast or just starting out, a well-arranged pegboard can revolutionize your workspace. We’ll guide you through simple steps to maximize your pegboard’s potential, helping you save time and boost productivity.
You’ll discover how to categorize, arrange, and maintain your tools effortlessly, creating a space where everything has its place. Dive in, and learn how to turn your tool storage from a jumbled mess into a streamlined sanctuary.
Benefits Of Pegboard Organization
Organizing tools on a pegboard offers many benefits for your workspace. It keeps your tools accessible and neatly arranged. This organization method enhances productivity and efficiency. You will find that your projects run smoother with an organized space. Let’s explore the specific advantages of using a pegboard.
Enhanced Visibility
A pegboard allows you to see all your tools at a glance. No more digging through boxes or drawers. Everything is in plain sight. This visibility reduces time spent searching. It makes your work process faster and easier.
Space Optimization
Pegboards make the most of vertical space. This is ideal for small workshops or garages. Hanging tools frees up valuable counter space. You can use that space for other tasks or projects.
Customizable Layout
You can arrange tools on a pegboard to suit your needs. Hooks, shelves, and baskets are easy to move. Change the layout as your projects evolve. This flexibility keeps your workspace efficient.
Easy Maintenance
Keeping a pegboard organized is simple. It takes only minutes to rearrange tools. Dust and dirt are easy to clean. A tidy board means a tidy workspace.
Improved Safety
Organized tools reduce the risk of accidents. No more stepping on stray tools. Everything has a designated spot. This reduces clutter and potential hazards.
Cost-effective Solution
Pegboards are affordable and durable. They last for years with minimal upkeep. This makes them a cost-effective organization solution. Save money while keeping your tools in order.
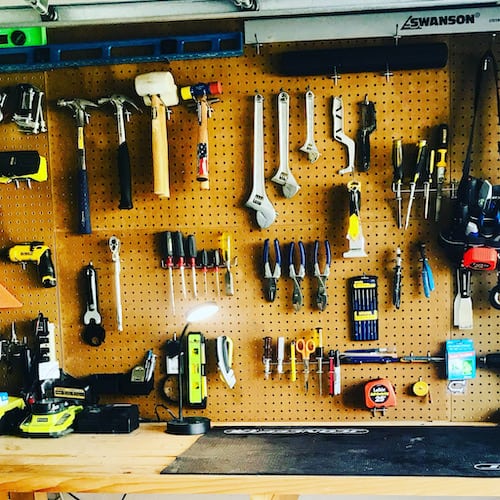
Credit: www.homedepot.com
Choosing The Right Pegboard
Selecting the ideal pegboard enhances tool organization efficiency. Arrange tools by size and frequency of use for easy access. Hooks and bins maximize space, keeping your workspace neat and tidy.
Choosing the right pegboard is the first step to organizing your tools effectively. It’s not just about hanging things on the wall; it’s about finding a system that fits your needs. The right pegboard can transform your workspace, making it more efficient and visually pleasing.
Material Options
When selecting a pegboard, consider the material that best suits your space and tools. Wood pegboards offer a classic look and are sturdy, making them ideal for heavier tools. However, they can be susceptible to moisture, so they’re better for indoor use. Metal pegboards are durable and can handle heavier loads. They often come in sleek designs, adding a modern touch to your garage or workshop. Plastic pegboards are lightweight and resistant to moisture, perfect for outdoor spaces or areas prone to humidity.
Size Considerations
Think about the size of the pegboard in relation to your available wall space and the number of tools you have. A large pegboard might be tempting, but does it fit your wall without overwhelming your space? Measure your wall and consider how much room you need for your tools to hang comfortably. A smaller pegboard can be ideal if you have limited space or only a few tools. It forces you to prioritize and organize efficiently. Consider your tool collection: are you planning to expand it? A larger pegboard might be a good investment for future growth. Choosing the right pegboard is about balancing your current needs with potential future changes. What material and size will best support your workflow? Evaluate your space, tools, and personal style to make an informed decision. Your choice will set the stage for a well-organized and functional workspace.
Essential Pegboard Accessories
Organizing tools on a pegboard transforms your workspace into a neat haven. Essential pegboard accessories are key to maximizing efficiency. These accessories help in arranging and accessing your tools easily. They ensure everything has a designated spot, eliminating clutter. By choosing the right accessories, you create a streamlined system.
Hooks And Holders
Hooks are perfect for hanging tools like hammers and wrenches. They come in different sizes to fit varied tool shapes. Holders offer a secure grip for screwdrivers and pliers. They keep tools from falling off the pegboard. Use hooks and holders to keep tools visible and reachable. This saves time and boosts productivity.
Bins And Shelves
Bins are ideal for storing small items like nails and screws. They prevent items from scattering around your workspace. Shelves provide space for larger tools and equipment. They offer a stable surface for items that can’t hang. Adding bins and shelves enhances organization and access. They help in keeping your workspace tidy and efficient.
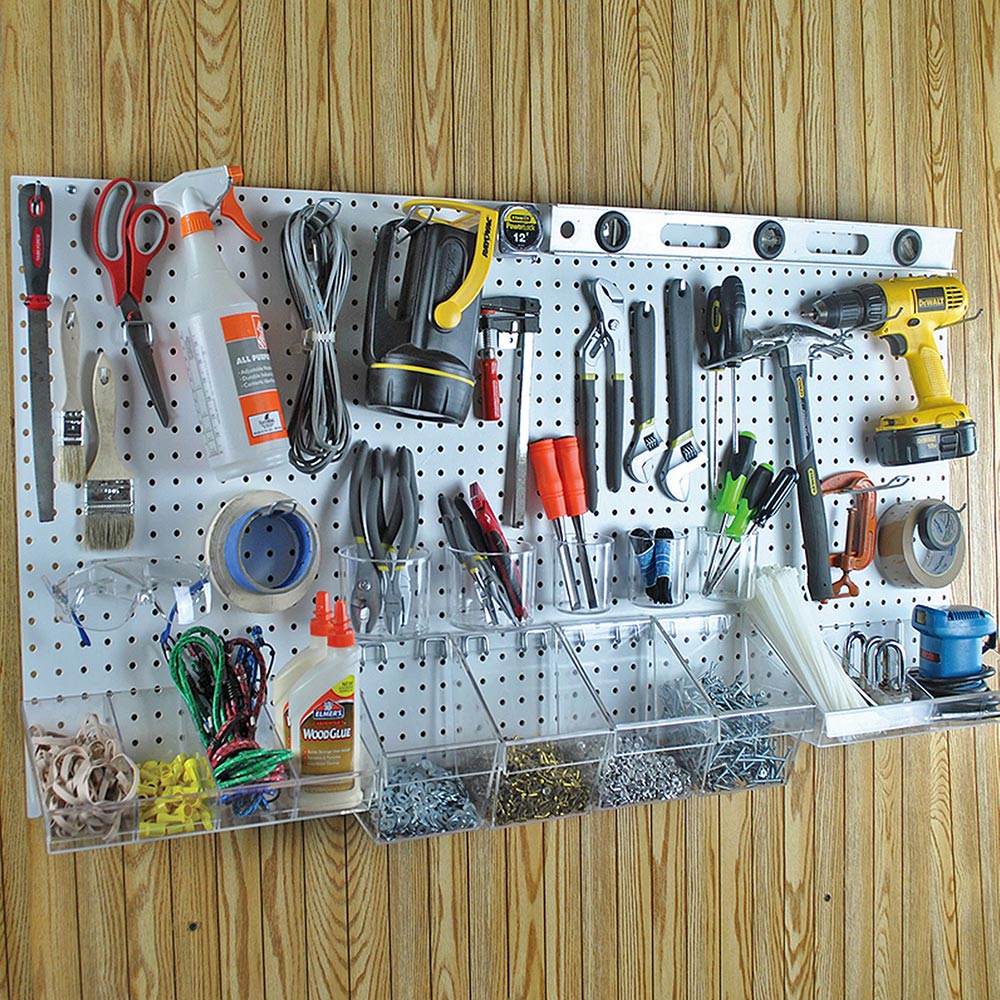
Credit: www.homedepot.com
Tool Categorization Strategies
Organizing tools on a pegboard can transform your workspace into a haven of efficiency. The key lies in effective tool categorization strategies. Proper categorization ensures you know exactly where each tool is, making your projects smoother and more enjoyable. The methods you choose for grouping your tools can greatly impact your workflow. Let’s dive into some practical strategies to help you categorize your tools effectively.
Grouping By Function
Have you ever reached for a screwdriver only to find it’s buried under a pile of paintbrushes? Grouping tools by function can save you from such frustration. When you organize your tools by their specific roles, it’s easier to locate what you need. For example, place all your cutting tools like scissors and knives together. This grouping makes it straightforward to grab everything you need for a particular task without searching through unrelated items.
Consider creating sections on your pegboard for different types of tasks. A section for measuring tools, another for fastening tools, and so on. This functional approach ensures you can quickly switch from one task to another without unnecessary interruptions. Does your pegboard reflect your workflow?
Arranging By Frequency Of Use
Another effective strategy is to arrange tools based on how often you use them. Tools you use daily should be within easy reach. This minimizes wasted time spent rummaging for frequently used items. Place rarely used tools higher up or in less accessible spots. This way, your pegboard remains uncluttered, and your most important tools are always at your fingertips.
Think about your last project. Which tools did you reach for repeatedly? These are the tools that should be front and center on your pegboard. By prioritizing accessibility for frequent-use tools, you enhance your productivity and streamline your workflow.
Organizing tools on a pegboard is not just about tidiness; it’s about optimizing your workspace. Embrace these categorization strategies to make your tool management efficient and enjoyable. What will you change on your pegboard today?
Maximizing Pegboard Space
Organizing tools on a pegboard is more than just hanging them up. It’s about using the space wisely to make your workshop efficient and enjoyable. Think about how you can fit more tools in less space without crowding your pegboard. A well-organized pegboard not only looks good but also saves you time when you’re in the middle of a project. Ready to maximize your pegboard space?
Vertical And Horizontal Arrangements
Consider the benefits of vertical arrangements. Hanging tools vertically can often save space and make tools easier to grab. Arrange your wrenches or screwdrivers in rows—they look tidy and are handy when you need them.
Horizontal arrangements can work wonders for larger tools. Place items like hammers or pliers horizontally to prevent them from sticking out awkwardly. This arrangement can also create visual balance on your pegboard.
Mixing vertical and horizontal arrangements might surprise you. It’s an effective way to use every inch of your pegboard. Which tools do you use most often? Position them in the easiest spots to reach.
Utilizing Empty Spaces
Don’t overlook the small gaps on your pegboard. Those tiny spaces can be perfect for small hooks or clips. Use them to hold tape measures or scissors, making them easily accessible.
Think creatively about empty spaces. Have you considered hanging jars or baskets? They can hold nails, screws, or other small items, keeping them organized and within reach.
Do you have a pegboard that feels half-empty? Adjusting the positions of your tools can reveal hidden gaps. Shift things around and see how much more you can fit.
Your pegboard can be a game changer in your workspace if used effectively. By maximizing its space, you’ll find your tools more quickly and even enjoy the process of organizing. How will you make the most of your pegboard today?
Maintaining Your Pegboard Setup
Organize tools on a pegboard by grouping similar items together. Use hooks and baskets for easy access. Label sections for quick identification and keep frequently used tools at eye level.
Maintaining your pegboard setup isn’t just about keeping it tidy. It’s about ensuring that your tools are always within arm’s reach and in their proper place. A well-maintained pegboard can boost your productivity and save you time searching for tools.
Regular Cleaning Tips
Dust and grime can sneak up on you. Over time, they can make your pegboard look cluttered and unappealing. Make it a habit to wipe your pegboard with a damp cloth every couple of weeks. This simple act can keep your tools looking fresh and extend their lifespan. Have you ever noticed how a clean workspace feels more inviting? It subtly encourages you to dive into your projects. Keep a small brush handy for those stubborn nooks and crannies.
Periodic Reorganization
Your needs evolve, and so should your pegboard setup. Every few months, take a step back and assess if your current arrangement is still serving you well. Ask yourself: Are the tools you use most often the easiest to reach? If not, it might be time to shuffle things around. Think about those moments when you couldn’t find a tool and how frustrating it was. Avoid those by periodically reorganizing your pegboard. A fresh setup can inspire new projects and make your workspace feel like new again. Keep your pegboard dynamic and tailored to your current needs.
Safety Considerations
Organizing tools on a pegboard not only enhances accessibility but also ensures safety. A well-thought-out setup can prevent accidents and tool damage. Consider these safety aspects to maintain a secure and efficient workspace.
Weight Limits
Each pegboard has a weight limit. Exceeding it can cause the board to fall. Check the manufacturer’s specifications for your pegboard’s weight capacity. Spread heavy tools evenly across the board. This helps balance the weight and prevents stress on a single area.
Secure Fastening Techniques
Properly secure pegs and hooks to the board. Loose fastenings can lead to falling tools. Use hooks that match the board’s hole size. Ensure pegs fit snugly and do not wobble. Regularly check and tighten fastenings. This keeps your tools secure and reduces the risk of accidents.
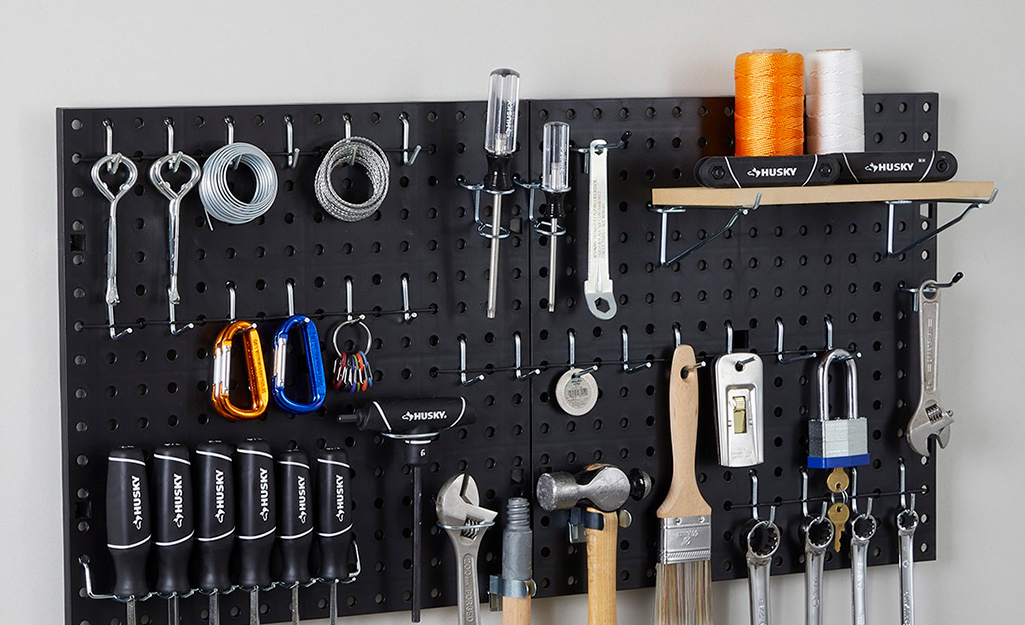
Credit: www.reddit.com
Frequently Asked Questions
How To Put Up Peg Board For Tools?
Mark stud positions on the wall. Drill holes and insert anchors. Secure pegboard with screws. Hang tools using hooks. Adjust as needed for organization.
How To Outline Tools On Pegboard?
Use a marker to trace tool outlines on the pegboard. Remove tools and draw over the traced lines.
How To Make Peg Board Look Good?
Paint the pegboard with vibrant colors or patterns. Add stylish hooks and baskets for organization. Use decorative frames or trim to enhance the edges. Arrange items creatively for a visually appealing display. Integrate small plants or artwork for added charm.
Keep the design consistent with your room’s decor.
How To Keep Peg Board Hooks In Place?
Use rubber grommets or clips to secure pegboard hooks. Install peg locks for added stability. Ensure hooks fit snugly.
Conclusion
Organizing tools on a pegboard boosts efficiency and saves time. Simple yet effective. Arrange tools by size or use for easy access. Labels help identify items quickly. Use hooks and baskets for odd-shaped tools. Regularly update your layout as your collection grows.
A tidy pegboard makes workspaces more inviting. Clear and organized. You’ll find what you need faster, reducing stress. No more clutter or confusion. A well-arranged pegboard is a practical solution for everyone. Start organizing today for a more productive workspace tomorrow.
Happy organizing!


