
When your car’s brake caliper starts acting up, it’s not just an annoyance; it’s a potential safety hazard. Imagine driving down the road, and suddenly your brakes feel spongy or start making strange noises.
That’s not something you want to ignore. In this guide, we’ll walk you through the steps to fix a brake caliper yourself, saving you time, money, and most importantly, ensuring your safety on the road. You don’t need to be a mechanic to tackle this task—just a little patience and the right guidance.
Ready to dive in and take control of your car’s braking system? Let’s get started!
Tools And Materials
Fixing a brake caliper requires specific tools and materials. These ensure safety and efficiency during the repair process. Proper preparation helps make the task easier and quicker. Understanding the essentials is key to a successful fix.
Essential Tools
A set of wrenches is important. They help remove and tighten bolts. A brake caliper tool is useful for compressing the caliper piston. A torque wrench ensures bolts are tightened correctly. A jack and jack stands provide stability. Use them to lift the car safely. A lug wrench removes the wheel. These tools are basic yet essential.
Required Materials
Brake fluid is necessary for refilling the system. It maintains proper braking function. A caliper rebuild kit contains seals and rubber components. These ensure proper sealing and function. Clean rags help in cleaning parts and removing debris. Anti-seize lubricant prevents bolts from sticking. It aids in smoother reassembly. These materials support the repair process.
Safety Precautions
Fixing a brake caliper requires careful attention to safety. Prioritize safety to prevent accidents and injuries. Implementing safety measures ensures a smooth and secure repair process.
Protective Gear
Always wear protective gear during repairs. Gloves protect your hands from sharp edges and hot parts. Safety glasses shield your eyes from debris and brake fluid splashes. A dust mask prevents inhalation of harmful particles. Protective footwear guards against heavy tools and parts.
Safe Work Environment
Create a safe work environment before starting. Ensure the car is on a flat, stable surface. Use wheel chocks to prevent the car from moving. Securely lift the car with a jack and place jack stands for support. Keep your workspace clean and organized. Remove any clutter that might cause tripping.
Ensure adequate lighting for visibility. A well-lit area helps you see clearly. Check that all tools are within easy reach. This prevents unnecessary movements and distractions. Follow these safety precautions to work confidently on your brake caliper.
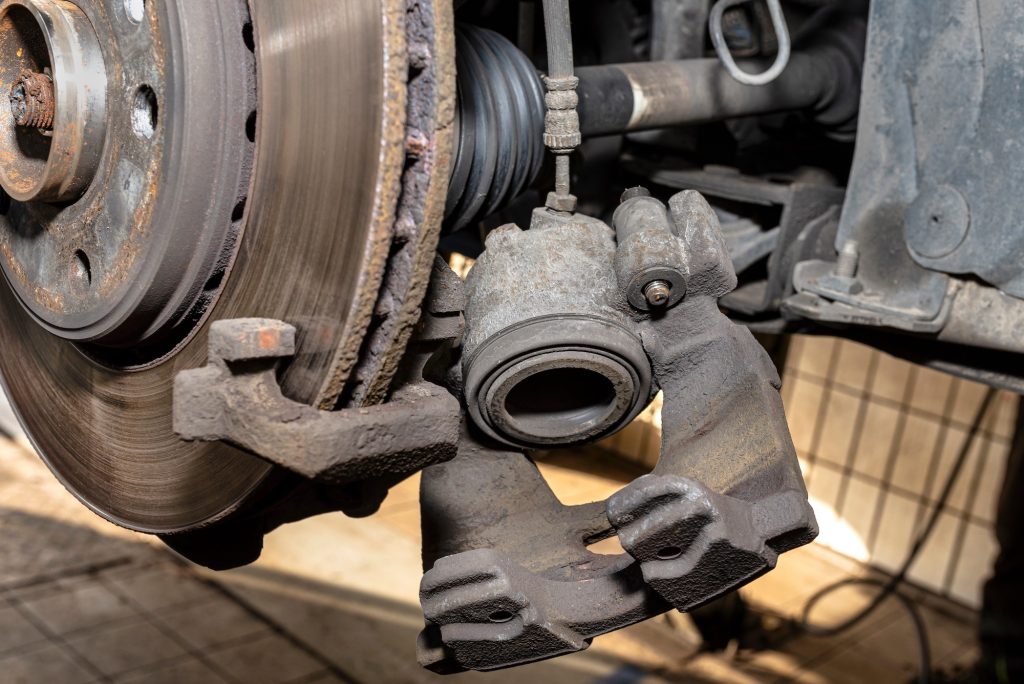
Diagnosing Brake Caliper Issues
Diagnosing brake caliper issues is crucial for maintaining your vehicle’s safety and performance. Brake calipers are essential components that apply pressure to the brake pads, enabling your car to stop effectively. Knowing how to identify problems with them can save you time, money, and prevent accidents. Let’s dive into how you can spot the signs of a faulty brake caliper and what inspection techniques to use.
Common Symptoms
Have you ever noticed a squealing sound when you apply the brakes? It could be more than just worn-out pads. A stuck or frozen caliper can cause uneven wear. If your car pulls to one side when braking, this might be another sign of a caliper issue. Pay attention to any vibrations in the steering wheel or brake pedal. These are often telltale signs something is amiss. Don’t ignore warning signs like a burning smell or leaks around your wheels.
Inspection Techniques
You don’t need to be a mechanic to do a preliminary check. Start by visually inspecting the brake calipers. Look for rust, leaks, or uneven wear on the brake pads. You can also gently shake the caliper to see if it’s loose. If you have access to a hydraulic jack, lift the car and spin the wheel. Listen for odd noises or resistance. A friend once found a stuck caliper this way, saving him from a costly repair down the road.
Consider using a caliper tool to measure the thickness of the brake pads. This tool can be found at most auto parts stores. Compare the measurements with the manufacturer’s specifications. If the pads are worn unevenly, you might have a caliper problem. A simple glance at the brake fluid level can also offer clues. Low fluid might indicate a leak or air in the brake lines.
What do you think? Have you ever faced brake caliper issues? Recognizing these symptoms early can prevent bigger problems. These inspection techniques are easy and can be done with minimal tools. Taking the time to check your brake calipers could be the difference between a smooth ride and an unexpected repair bill.
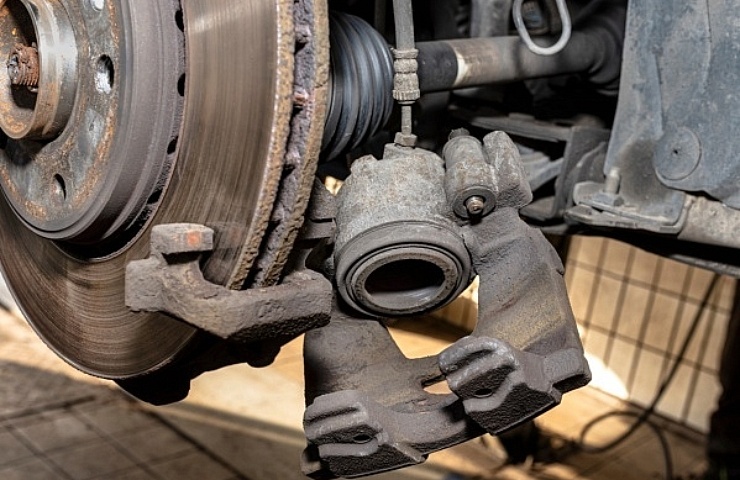
Credit: www.ebay.com
Removing The Brake Caliper
Removing a brake caliper might sound like a daunting task, but with a little patience and the right guidance, you can do it yourself. This section will guide you through the essential steps to safely remove your brake caliper, ensuring your vehicle is ready for any necessary repairs or maintenance. Whether you’re a seasoned DIY mechanic or a beginner eager to learn, these practical steps will help you tackle this task with confidence.
Preparing The Vehicle
Before you dive in, ensure your vehicle is parked on a level surface. Engage the parking brake to prevent any unwanted movement. Gather your tools – a jack, jack stands, and a wrench set are essential.
Safety first: wearing gloves and goggles can prevent injuries. You wouldn’t want a rogue piece of debris flying into your eye, would you? Elevate your vehicle with the jack, then secure it with jack stands. This stable setup allows you to work comfortably and safely.
Unbolting The Caliper
Locate the bolts securing the caliper to the wheel hub. Typically, you’ll find two bolts at the rear of the caliper. Using a wrench, begin loosening these bolts. It might take a bit of elbow grease, but persistence is key.
Once the bolts are loose, carefully remove them and set them aside. Remember, these small parts are easy to misplace, and you don’t want to play hide-and-seek with essential components. As you unbolt the caliper, ask yourself: what other challenges might you face in car maintenance, and how would you tackle them?
Gently slide the caliper off the rotor. If it seems stuck, a little wiggle can help. Ensure you support the caliper properly to avoid damaging the brake line. Consider using a bungee cord or wire to hang the caliper, preventing strain on the brake hose.
With the caliper removed, you’re ready for the next steps in your brake repair journey. Remember, each task you conquer adds to your skill set. Are you ready to tackle more complex repairs on your own?
Disassembling The Caliper
Disassembling the caliper is a crucial step in fixing a brake caliper. Begin by removing the brake pads and caliper bolts. Carefully detach the caliper from the rotor, ensuring no damage to surrounding components.
Disassembling a brake caliper can seem daunting, but it’s a task you can tackle with confidence. Knowing the steps to take and the components involved is crucial. With the right approach, you can ensure your vehicle’s braking system remains in top condition.
Caliper Components
Before you start, familiarize yourself with the caliper’s key components. You’ll typically encounter the caliper bracket, piston, and brake pads. Each part plays a vital role in the braking process, and understanding their function is essential for effective disassembly. A friend of mine once skipped this step and ended up damaging the piston. Don’t make the same mistake. Identifying each component correctly will save you time and frustration.
Cleaning And Examination
Once the caliper is apart, it’s time to clean and examine each piece. Use a brake cleaner spray to remove dirt and brake dust. This ensures that no debris interferes with the caliper’s operation. Examine each component for signs of wear or damage. Look for cracks in the piston or uneven wear on the pads. If you spot any issues, replacing the damaged parts is crucial for safety. Have you ever considered how a simple cleaning can extend the life of your caliper? Keeping components clean not only enhances performance but also helps you catch problems early. Remember, a clean caliper is a happy caliper.
Repairing Or Replacing Parts
When dealing with brake calipers, one of the crucial steps is deciding whether to repair or replace parts. This decision can influence the performance and longevity of your braking system. Understanding the nuances of fixing seals and pistons, as well as replacing worn components, can make all the difference in ensuring your vehicle’s safety.
Fixing Seals And Pistons
Seals and pistons within the brake caliper are pivotal for maintaining pressure and ensuring smooth operation. A common issue you might encounter is a leaking seal. If you notice fluid around the caliper, it’s time to address the seals.
Begin by removing the caliper from the wheel. Carefully take out the piston using a brake piston tool. Inspect the seals; if they’re cracked or stiff, they need replacement.
During a summer road trip, my car’s brake performance dwindled due to worn seals. I learned firsthand the importance of having a seal kit on hand. Replacing those seals improved braking efficiency almost instantly.
Clean the piston and caliper bore thoroughly. Apply a thin coat of brake fluid to the new seals and reinstall them. Finally, reinsert the piston, ensuring it’s seated correctly. This small step can prevent leaks and extend the life of your brake system.
Replacing Worn Components
Worn components in brake calipers can lead to uneven braking and noise. How do you know when it’s time to replace them? Listen for grinding sounds or feel for vibration when braking.
Start by inspecting the brake pads and rotors. If the pads are less than a quarter of an inch thick, it’s time for new ones. Also, look for grooves or scoring on the rotors.
Once, during a routine check, I found my brake pads were wearing unevenly. Replacing them not only solved the noise issue but also improved my car’s stopping power.
Use a brake tool kit to replace these components. Ensure the new parts are compatible with your vehicle model. This proactive approach can save you from unexpected brake failures.
Are you ready to roll up your sleeves and tackle these repairs? Taking the time to fix or replace these critical components can enhance your driving experience and keep you safe on the road.
Reassembling The Brake Caliper
Reassembling the brake caliper is a crucial step in fixing it. Ensure all parts are clean and in place. Tighten bolts securely to avoid any leaks or malfunctions.
Reassembling the brake caliper is a crucial step in ensuring your vehicle’s braking system is back to optimal performance. After removing, cleaning, and inspecting each part, putting everything back together requires patience and attention to detail. You don’t want to find out you missed a step while driving down a steep hill.
Reinstalling Parts
Start by carefully placing the brake pads back into the caliper bracket. Make sure the pads are aligned correctly; they should slide in smoothly without forcing them. A little nudge might be necessary but avoid using excessive force. Next, secure the caliper piston back into place. Use a C-clamp to gently compress it, ensuring it fits snugly. Remember, the piston must retract fully; otherwise, it might cause the brake pads to drag against the rotor. Finally, reattach the caliper to the bracket using the mounting bolts. Tighten them firmly, but be careful not to overdo it. A torque wrench can be a handy tool here to ensure you meet the manufacturer’s specifications.
Ensuring Proper Fit
Once everything is back in place, take a moment to double-check the alignment. Are the brake pads sitting flush against the rotor? Any gaps or unevenness could lead to uneven wear and poor braking performance. Check that the caliper slides easily along its guide pins. If it doesn’t, you might need to apply a bit of grease to the pins. This step prevents the caliper from sticking, which can cause brake pads to wear out prematurely. Ask yourself: Have you tightened every bolt securely? A loose component can become a dangerous hazard. Use your hands to feel for any wobbles or unusual movement. Reassembling your brake caliper with precision can be the difference between a smooth ride and a potential mishap. Take your time, and make sure each part is exactly where it needs to be. What other maintenance tasks do you find challenging?
Reinstalling The Brake Caliper
Fixing a brake caliper involves careful removal and reinstallation. Ensure the caliper is clean and free of debris. Secure it tightly and check for any leaks or abnormal noises after installation.
Reinstalling the brake caliper is a crucial step. It ensures your vehicle’s safety. After removing and inspecting, it’s time to put it back. Follow these steps carefully.
Positioning The Caliper
First, align the caliper with the brake disc. Make sure it fits snugly. Check the position of the caliper bracket. It should match the mounting points. Use both hands for steady placement. This prevents misalignment. Once positioned, check again. Ensure it sits flush against the disc.
Securing Bolts And Connections
Next, secure the caliper with bolts. Start threading each bolt by hand. This avoids cross-threading. Once hand-tight, use a wrench. Tighten each bolt evenly. This ensures a secure fit. Don’t forget the brake hose connection. Attach it firmly to the caliper. Check for any leaks or loose connections. Make sure every part is tight and secure. A secure caliper ensures safe braking. `
Testing And Adjustments
Testing and adjustments ensure a brake caliper functions properly. Begin by checking for leaks and ensuring bolts are tight. Next, test the brakes by pressing the pedal to feel for smooth, even pressure. Adjust accordingly to maintain optimal performance and safety.
Fixing a brake caliper is an essential skill for any car enthusiast or DIY mechanic. The process is not complete until you test and adjust the caliper to ensure optimal performance. This crucial step verifies that the caliper is functioning correctly and aligns with safety standards. Without it, all your efforts may go to waste, leaving your vehicle’s braking system compromised. Let’s explore how you can effectively test and adjust your brake caliper. Checking Brake Functionality Before you hit the road, it’s vital to check if your brake caliper is working correctly. Start by pressing the brake pedal and observing if it feels firm. A spongy pedal indicates air in the system or a faulty caliper. Next, take a short drive around your block. Listen for any unusual noises like grinding or squealing. These sounds can be a clue that something needs fixing. Don’t forget to check for leaks! Inspect the brake fluid reservoir and surrounding areas. Leaks can lead to brake failure, so it’s crucial to address them immediately. Fine-Tuning Caliper Performance Once you’ve ensured basic functionality, it’s time to fine-tune the caliper for better performance. Adjust the caliper alignment to ensure even wear on the brake pads. Misalignment can cause uneven braking and premature pad wear. Consider adjusting the caliper piston if the brakes feel too tight or too loose. This can help achieve the perfect balance, offering smooth braking without overexerting the system. Are you experiencing vibrations when braking? This could be due to uneven rotor contact. Ensure the caliper grips the rotor evenly to minimize vibrations and maximize braking efficiency. Testing and adjustments aren’t just technical steps; they’re your assurance of safety. Have you ever felt the difference a well-adjusted caliper makes? It can transform your driving experience, making it smoother and safer. So, as you work on your brake caliper, remember that these adjustments aren’t just tweaks—they’re essential steps that protect you and your passengers.

Credit: m.youtube.com
Maintenance Tips
Maintaining your brake caliper is crucial for safe driving and prolonging the lifespan of your vehicle’s braking system. Regular care not only prevents costly repairs but also ensures you can stop your vehicle effectively when needed. These maintenance tips will guide you through essential practices to keep your brake calipers in top condition.
Routine Inspections
Regularly inspect your brake calipers to catch any early signs of wear or damage. Look for leaks, cracks, or unusual wear on the brake pads. You don’t need to be a mechanic to spot these issues. A visual check every few months could save you from unexpected brake failures.
Consider setting reminders on your phone or calendar. This way, you won’t forget to perform these checks. It’s like scheduling a doctor’s appointment, but for your car.
Preventive Measures
Preventive maintenance can help avoid larger issues down the road. Ensure the bolts holding your calipers are tight and secure. Loose bolts can lead to vibrations and uneven braking.
Keep your brake system clean. Dirt and debris can interfere with the caliper’s function. A simple wipe down with a clean rag can make a difference.
Have you ever had a brake squeal that just wouldn’t go away? Applying anti-seize lubricant on the caliper’s contact points may reduce noise. This small step can improve your driving experience significantly.
Consider investing in high-quality brake pads. They tend to last longer and perform better. A little extra upfront cost can lead to savings later.
Ask yourself: Is your car telling you something? Strange noises or changes in braking performance might be signs of caliper issues. Listening to your vehicle could prevent dangerous situations.
By following these tips, you can ensure your brake calipers remain reliable and efficient. Your safety on the road depends on regular maintenance and attention to detail.

Credit: www.youtube.com
Frequently Asked Questions
How Do I Know If My Brake Caliper Is Bad?
A bad brake caliper often shows signs like uneven brake pad wear, leaking brake fluid, or a spongy brake pedal. Squealing or grinding noises while braking can also be indicators. It’s essential to address these issues promptly to ensure safe driving conditions.
Can I Replace A Brake Caliper Myself?
Yes, you can replace a brake caliper yourself if you have mechanical skills and the right tools. Follow the vehicle’s manual and safety guidelines carefully. However, if unsure, it’s best to consult a professional mechanic to avoid complications and ensure proper installation.
What Tools Do I Need To Fix A Brake Caliper?
To fix a brake caliper, you’ll need a wrench set, brake fluid, a C-clamp, and a jack. Additionally, brake cleaner and a drip pan are essential. Having these tools ensures a smoother repair process and helps maintain safety standards during the task.
How Long Does It Take To Fix A Brake Caliper?
Fixing a brake caliper typically takes about one to two hours. This time can vary based on experience and vehicle type. Ensure you have all necessary tools and follow instructions carefully to complete the repair efficiently and safely.
Conclusion
Fixing a brake caliper boosts your car’s safety. Regular maintenance keeps brakes responsive. This ensures reliable stopping power on every drive. Always check for wear and tear. Listen for unusual noises. Test braking performance frequently. Address issues promptly for peace of mind.
Simple steps make a big difference. Your car will thank you. Brake care means safer journeys. Keep tools ready for quick repairs. Consult a professional if unsure. Safety comes first. A well-maintained brake caliper is crucial. Smooth driving awaits. Enjoy the road with confidence.


