Have you ever tried hanging a picture frame or installing a new shelf, only to wonder where the studs in your plaster wall are hiding? It’s a puzzle that can leave you feeling frustrated and confused.
But don’t worry, you’re not alone! Finding studs in plaster can be tricky, but it’s a skill worth mastering. Why? Because knowing exactly where those sturdy supports are can make all the difference in securely mounting your treasured belongings. In this guide, you’ll discover simple and effective techniques to locate studs without the guesswork.
Ready to transform your DIY project into a success and eliminate the fear of damage? Let’s dive in and unlock the secrets of your walls.

Credit: thecraftsmanblog.com
Tools For Finding Studs
Discovering studs in plaster walls is essential for secure hanging. Use a stud finder for accuracy. A magnet can also locate nails in studs. Knocking on the wall helps identify hollow areas.
Finding studs in plaster can be a real challenge, but the right tools can make the job much easier. Whether you’re hanging a picture or mounting a TV, knowing where those studs are is crucial. I’ve tried several methods over the years, and each tool has its own quirks and advantages. Let’s dive into some of the most effective tools for finding studs in plaster.
Stud Finders
Stud finders are a popular choice for many. They’re electronic devices designed to detect changes in the density of the wall, which usually indicates the presence of a stud. Simply glide the device across your plaster wall, and it will alert you when it detects a stud. Some models even have LED displays that guide you. If you’re new to using a stud finder, start with a basic model. It’s straightforward and doesn’t overwhelm you with features. However, make sure the batteries are fresh. A low battery can give false readings, making the process frustrating.
Magnet Tools
Magnet tools are a less techy, but equally effective method. These tools rely on the magnetic attraction to the nails or screws used to secure the plaster to the studs. Just move a small, strong magnet across the wall until it sticks. This usually indicates a nail or screw is nearby, pointing you to a stud. Magnet tools are inexpensive and don’t require batteries, which is a major plus. However, they might not work as well on thicker plaster walls. If you’re struggling, try using a more powerful magnet or a stud finder as a backup.
Knock And Listen Method
The knock and listen method is a bit old-school but can be surprisingly effective. It’s as simple as it sounds: knock on the wall and listen. A hollow sound suggests you’re between studs, while a solid sound indicates you’ve found one. This method requires a good ear and some patience. When I first tried it, I was skeptical. But with practice, I became quite adept. It’s a great trick if you’re without tools, but remember, it’s not foolproof. Always double-check your findings with another method to ensure accuracy. Which tool resonates with you the most? Whether you opt for a gadget or your own senses, the right tool can save you time and hassle. So next time you’re faced with a plaster wall, remember these methods and choose the one that suits your style.
Preparing The Wall
Finding studs in plaster walls can be tricky. Proper preparation ensures accuracy and ease. Follow these simple steps before you start searching.
Clearing The Wall Surface
Start by removing all decorations. Take down any frames or mirrors. Clear away shelves or hooks. Make sure the wall is free of obstacles. This helps in accessing the plaster easily. A clear wall ensures precise detection of studs.
Dust off the wall with a clean cloth. Remove any cobwebs or dirt. A clean surface improves visibility. It also enhances the performance of tools used.
Marking Potential Areas
Look for signs of studs. Check for visible patterns or lines. Sometimes studs leave subtle traces. These are usually spaced evenly. Note these areas for further inspection.
Use a measuring tape. Measure from a corner or outlet. Most studs are 16 or 24 inches apart. Mark these spots with a pencil. Accurate marking saves time later.
Listen for hollow sounds. Gently tap the wall with your knuckles. Hollow areas suggest absence of studs. Solid sounds indicate potential stud presence. Mark these solid areas for investigation.
Using A Stud Finder
Finding studs in plaster walls can be tricky. A stud finder helps locate hidden studs accurately. Simply slide it across the wall until it signals a stud’s presence.
Using a stud finder is one of the most efficient ways to locate studs in plaster walls. This handy tool saves you time and effort, ensuring you avoid the guesswork that often comes with tapping or drilling into walls. Whether you’re hanging a picture frame or installing shelves, a stud finder can be your best friend.
Calibrating The Device
Before you start scanning, it’s crucial to calibrate your stud finder. This step ensures accuracy, as a poorly calibrated device can lead to false readings. To calibrate, place the stud finder flat against the wall and turn it on. Wait for the device to beep or flash a light, indicating it’s ready. If your stud finder has a manual calibration button, press it while holding the device steady against the wall. Release the button when the calibration process is complete. This might take a few seconds, but the payoff is worth it.
Scanning Techniques
Once calibrated, begin scanning the wall. Hold the stud finder against the plaster and move it slowly in a horizontal line. Keep your hand steady, and maintain consistent pressure for the best results. Listen for beeps or watch for lights that signal a stud is detected. Sometimes, the device may give inconsistent readings. Try scanning from different angles or directions to confirm the stud’s location. It can help to mark the wall lightly with a pencil when you first detect a stud, then verify by scanning again from the opposite side. Have you ever been frustrated by a stud finder that wouldn’t cooperate? It might be due to interference from wires or metal pipes. Make sure to scan carefully, and if you’re unsure, double-check with another technique. Using a stud finder can feel like a small victory when you finally hear that beep. It’s the sound of success, telling you that your project can proceed with confidence. So, have you tried using a stud finder yet? What challenges did you face, and how did you overcome them?
Credit: www.zircon.com
Magnet Method
Discover studs in plaster walls using the Magnet Method. Slide a strong magnet along the wall surface. The magnet will stick where it finds a screw or nail, marking the stud’s position. This simple technique helps avoid guesswork and makes your DIY projects easier.
Finding studs in plaster walls can be a daunting task. But with the right tools and techniques, it becomes a straightforward process. The Magnet Method is one of the simplest ways to locate those elusive studs. This method is not only effective but also cost-efficient, requiring just a magnet to detect the screws or nails that secure the lath to the studs. When I first attempted to hang a heavy mirror on my living room wall, I was skeptical about finding the studs without an expensive stud finder. Little did I know, a simple magnet from my fridge would do the trick!
Choosing The Right Magnet
Not all magnets are created equal. A strong magnet is essential to effectively detect the hidden screws and nails in plaster walls. Neodymium magnets are a great choice due to their strength and small size. These can easily stick to metal fasteners, even through layers of plaster. If you don’t have a neodymium magnet, a refrigerator magnet can work too, but it might require a bit more patience. Have you ever wondered why some magnets just don’t seem to stick as well? It’s all about the magnet’s strength and the wall’s thickness.
Locating Screws And Nails
Once you’ve chosen the right magnet, it’s time to start the search. Hold the magnet gently against the wall and move it slowly in a horizontal line. Feel for a pull or a stick—this is the magnet interacting with a screw or nail beneath the surface. Mark these spots with a pencil or piece of tape. Repeat this process every few inches until you’ve marked a vertical line of screws or nails. This line indicates the location of the stud. Have you ever considered how satisfying it is to find that first magnetic pull? It’s a bit like solving a puzzle! Using the Magnet Method is a practical and efficient way to find studs without unnecessary expense or hassle. So, next time you’re planning to mount something heavy, remember your trusty magnet could be your best tool.
Knock And Listen Technique
Finding studs in plaster walls can seem tricky. The “Knock and Listen Technique” offers a straightforward approach. This method involves tapping the wall. Then, listening for sound changes. It’s simple and effective for locating studs without special tools.
Sound Variations
When you knock on a plaster wall, listen carefully. Different areas produce different sounds. Hollow areas sound echoey or empty. Solid areas sound duller and more muted. These sound variations guide you to the stud location.
Identifying Solid Areas
Start by knocking lightly on the wall. Move horizontally in a straight line. Listen for the change in sound. A solid area indicates a stud behind the plaster. Mark this spot lightly with a pencil. Continue knocking to ensure accuracy. Studs are typically 16 to 24 inches apart.
Confirming The Stud Location
Finding studs in plaster walls can be tricky. Once you think you’ve found a stud, confirming the location is crucial. Precision matters to avoid costly mistakes. This section will guide you through confirming the stud’s location accurately.
Drilling A Pilot Hole
Drilling a small pilot hole is a reliable method. Use a small drill bit to penetrate the plaster. This avoids damaging the wall. If you hit wood, you found the stud. Use gentle pressure to avoid plaster cracks.
After drilling, check the debris. Wood shavings confirm a stud. If you find plaster dust, adjust your location. Fill the hole with spackle for a clean finish.
Double-checking With Multiple Methods
Verify the stud location using multiple methods. Use a magnet to find nails or screws in the wall. These often indicate a stud beneath. Slide the magnet slowly across the wall. Listen for clicks or resistance.
Consider using a stud finder. This tool detects changes in density, highlighting stud locations. Follow the manufacturer’s instructions for best results.
Another method is tapping the wall. Listen for a solid sound, indicating a stud. Hollow sounds mean no stud. Repeat this process for accuracy.
Common Mistakes To Avoid
Avoid guessing stud locations in plaster walls. Use a reliable stud finder for accuracy. Steer clear of excessive drilling, which can cause damage.
Finding studs in plaster walls can be a bit tricky if you don’t know what you’re doing. Many people make common mistakes that can lead to frustration and wasted time. By being aware of these pitfalls, you can save yourself a lot of hassle and find those elusive studs efficiently. Let’s explore some of these common mistakes and how you can avoid them.
Relying On One Method
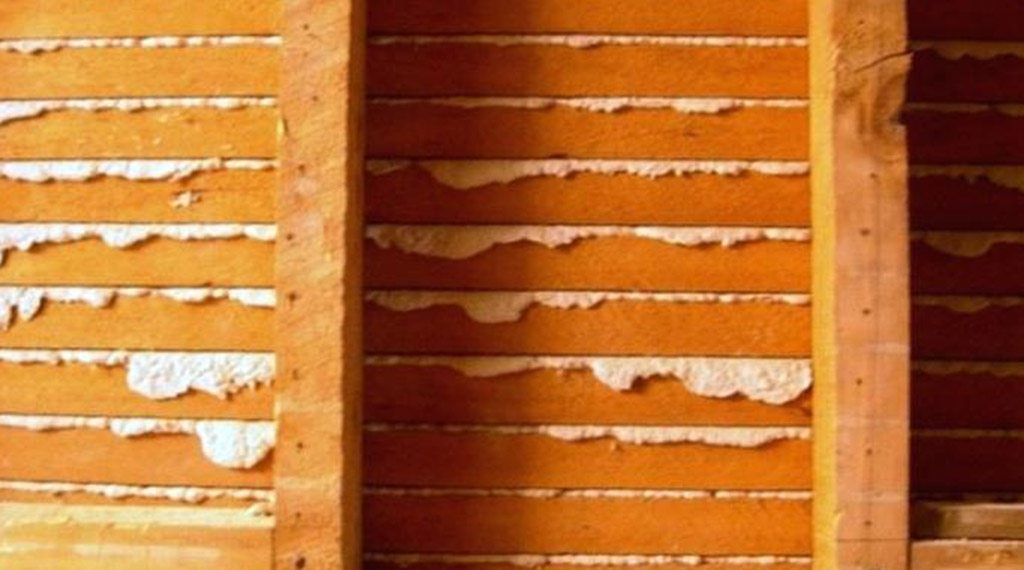
When searching for studs, many people tend to rely solely on one method, like a magnetic stud finder. While these tools can be helpful, they may not always be accurate in plaster walls. Plaster often contains metal lath, which can throw off readings. Instead of depending on just one tool, consider using a combination of methods. Tap the wall lightly and listen for changes in sound. Use a flashlight to look for slight dimples or repairs in the paint where nails may have been used. Combining different approaches increases your chances of success.
Ignoring Wall Composition
Another common mistake is ignoring the composition of your wall. Plaster walls are not all the same, and knowing what you’re working with is crucial. Some plaster walls have wooden lath, while others have metal. This difference can affect how you find the studs. For example, using a magnetic stud finder on a wall with metal lath can lead to false positives. Have you ever tried using a screwdriver instead? A small poke might help you confirm the presence of a stud without damaging the wall. Understanding your wall’s composition helps you choose the right tools and techniques. It’s like knowing the terrain before setting off on a hike—your journey becomes much smoother. What’s your go-to method for finding studs in plaster? Share your experiences in the comments below!
Credit: www.whittinspections.com
Tips For Accurate Results
Finding studs in plaster walls can be tricky. Accurate results are essential for safety and stability. Follow these tips to improve your success. Use the right techniques and tools. Regular calibration ensures precision. Let’s explore effective methods for accuracy.
Using Multiple Techniques
Relying on one method can lead to errors. Combine different techniques for better accuracy. Tap the wall gently and listen for changes in sound. Look for slight indentations or imperfections on the surface. Use a magnet to detect metal screws or nails in the studs. These methods together enhance the chances of finding the right spot.
Regularly Calibrating Tools
Tools may lose accuracy over time. Regular calibration is crucial. Follow the manufacturer’s instructions for calibrating stud finders. Ensure batteries are fresh and fully charged. Test your tool on a known stud location to check accuracy. Consistent calibration leads to reliable results.
Frequently Asked Questions
What Tools Can Detect Studs In Plaster?
You can use a stud finder, magnet, or tapping technique to locate studs. Electronic stud finders offer precision, while magnets help identify screws or nails. Tapping the wall can reveal hollow sounds between studs, assisting in identification.
Can I Find Studs Without A Stud Finder?
Yes, finding studs without a stud finder is possible. Look for electrical outlets or light switches, as they are often mounted on studs. You can also use a magnet or tap the wall to identify differences in sound.
How Far Apart Are Studs Usually Placed?
Studs are typically spaced 16 or 24 inches apart. Measuring from a corner or outlet can help find the next stud. Use a tape measure to ensure accuracy and consistency when locating studs in plaster walls.
Why Is It Important To Find Studs?
Finding studs is crucial for safely hanging heavy items. They provide structural support to avoid damaging walls. Properly mounting objects on studs ensures stability and prevents accidents or wall damage.
Conclusion
Finding studs in plaster can seem tricky, but it’s manageable. Use tools like stud finders for accuracy. Alternatively, tap and listen for sound changes. Try measuring from corner walls too. Each method offers unique benefits. Choose what suits your needs best.
Practice will improve your skill over time. Understanding these techniques saves time and effort. It ensures secure installations for your home projects. Remember, patience is key. Happy home improving!

