
Ever found yourself puzzled by a tiny electronic component that plays a crucial role in your devices? Diodes are like the unsung heroes of electronics, ensuring current flows in the right direction and protecting circuits from damage.
But what happens when they stop doing their job correctly? That’s where you come in. Learning how to check diodes with a multimeter can save you time, money, and a lot of frustration. You don’t need to be an electronics wizard to master this skill; with a multimeter in hand and a few easy steps, you can diagnose a diode’s health like a pro.
Imagine the satisfaction of identifying and fixing the problem yourself. So, are you ready to unlock the mystery of diodes and gain some handy troubleshooting expertise? Dive into this guide to empower your DIY spirit and keep your gadgets running smoothly.
Understanding Diodes
Diodes are essential components in electronics, acting as one-way gates for electrical current. To effectively work with diodes, you need to understand their functionality and types. This knowledge equips you to test them accurately using a multimeter. As you dive into the world of diodes, consider how these small components play a big role in the devices you use daily.
Basic Functionality
Diodes allow current to flow in only one direction. This unique feature makes them invaluable in circuits, preventing reverse current that can cause damage. Imagine a diode as a one-way street for electricity, ensuring the flow is controlled and safe.
They are used in many applications, from converting AC to DC in power supplies to protecting sensitive components from voltage spikes. Each function showcases the diode’s ability to manage and direct electrical flow effectively.
Understanding their basic functionality can enhance your troubleshooting skills. When you test diodes, you’re checking their ability to block and conduct current as expected. This understanding is key to diagnosing issues in electronic circuits.
Common Types
There are several types of diodes, each serving specific purposes. The most common include rectifier diodes, Zener diodes, and light-emitting diodes (LEDs). Each type has unique characteristics and applications.
Rectifier diodes are used to convert AC current to DC. They are the backbone of power supply circuits. Zener diodes regulate voltage, providing stability in circuits by maintaining a constant voltage level.
LEDs, on the other hand, convert electrical energy into light. They are used in displays and indicators, showcasing how diodes can also be a source of illumination. Knowing these types helps you choose the right diode for your project.
Have you ever wondered how your favorite gadgets manage power so efficiently? Diodes play a crucial role in that process. By understanding them, you can appreciate the technology behind everyday electronics and perhaps solve a few mysteries next time your device acts up.
Multimeter Basics
Understanding how to check diodes with a multimeter begins with mastering the basics. A multimeter is an essential tool for testing electronic components, including diodes. It measures voltage, current, and resistance. Knowing how to use it properly ensures accurate readings and safe testing.
Types Of Multimeters
Multimeters come in two main types: analog and digital. Analog multimeters use a needle to display readings on a scale. They are less common today but can be useful for specific tasks. Digital multimeters show readings on an LCD screen. They are more accurate and easier to read. Most people prefer digital multimeters due to their precision.
Key Features
When selecting a multimeter, consider several key features. First, ensure it has a diode testing function. This function simplifies checking diodes. Look for auto-ranging capabilities. Auto-ranging multimeters adjust their range automatically, which saves time and effort. Also, check for a durable build. A sturdy design ensures your multimeter lasts longer.
Safety is crucial. Choose a multimeter with overload protection. This feature prevents damage from high currents. Finally, make sure the multimeter has a clear display. A large, backlit screen helps in low-light conditions. These features make testing diodes easier and safer.
Preparing For Diode Testing
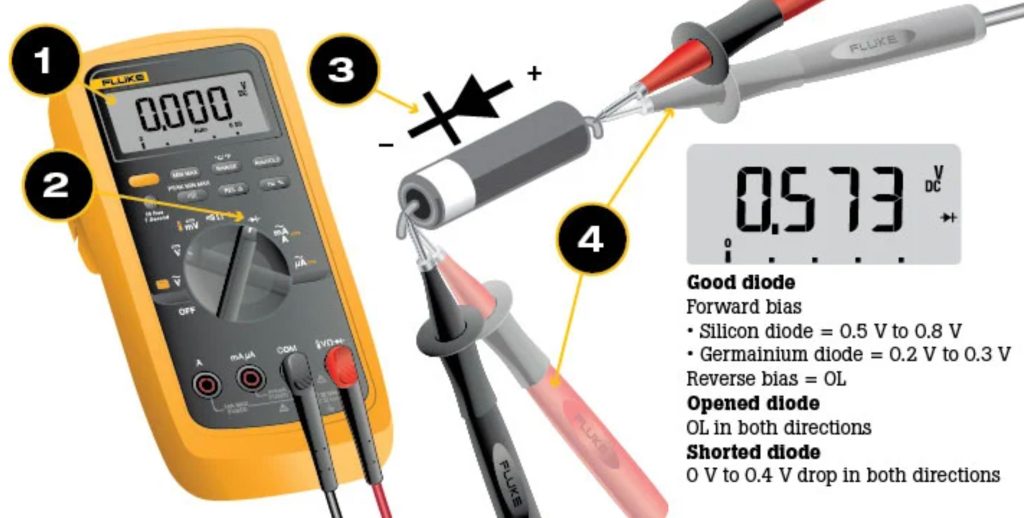
Testing diodes with a multimeter involves setting the device to the diode testing mode. Place the probes on the diode’s terminals, ensuring correct polarity. A good diode will show a small voltage drop, while a faulty one may display zero or infinite resistance, indicating a problem.
Before diving into the world of diode testing with a multimeter, it’s crucial to lay the groundwork. Proper preparation not only ensures accurate readings but also protects both you and your equipment from potential mishaps. By setting the stage with some essential steps, you’ll be ready to tackle diode testing with confidence and precision.
Safety Precautions
Safety should always be your top priority. Before testing, make sure your multimeter is in good working condition and that you know how to use it safely. Double-check that the device or circuit you’re testing is powered off. This simple step can prevent electrical shocks and protect your multimeter from damage. Are you wearing the right gear? Use insulated gloves if you’re working in a high-voltage environment. It’s a small step that can make a big difference.
Gathering Necessary Tools
To test diodes effectively, you’ll need a few basic tools. A reliable multimeter is, of course, at the top of the list. Ensure that it has a diode testing mode; most digital multimeters do. Keep a pair of test leads handy. These will connect your multimeter to the diode, enabling you to read its characteristics accurately. A small tool kit with pliers and a screwdriver can be helpful. Sometimes diodes are embedded in circuits, and these tools will help you access them without hassle. Have you ever started a project only to find you’re missing an essential tool? It can be frustrating, to say the least. By gathering everything you need beforehand, you avoid unnecessary interruptions. Testing diodes might seem daunting at first, but with the right preparation, it becomes a straightforward task. Take the time to set up properly, and you’ll find that the process not only becomes easier but also more enjoyable. What do you think? Are you ready to test some diodes?
Credit: techcircuit.org
Testing Diodes With A Multimeter
Testing diodes with a multimeter can seem tricky. But it’s simple with the right steps. Diodes allow current to flow in one direction. A multimeter can test if a diode is working properly. This process involves checking the diode’s forward and reverse bias states. Let’s break down the steps for accurate results.
Setting The Multimeter
First, turn on your multimeter. Set it to the diode test mode. This mode often uses a diode symbol. Ensure the multimeter probes are correctly attached. The red probe connects to the positive terminal. The black probe connects to the negative terminal. This setup is crucial for accurate readings.
Conducting The Forward Bias Test
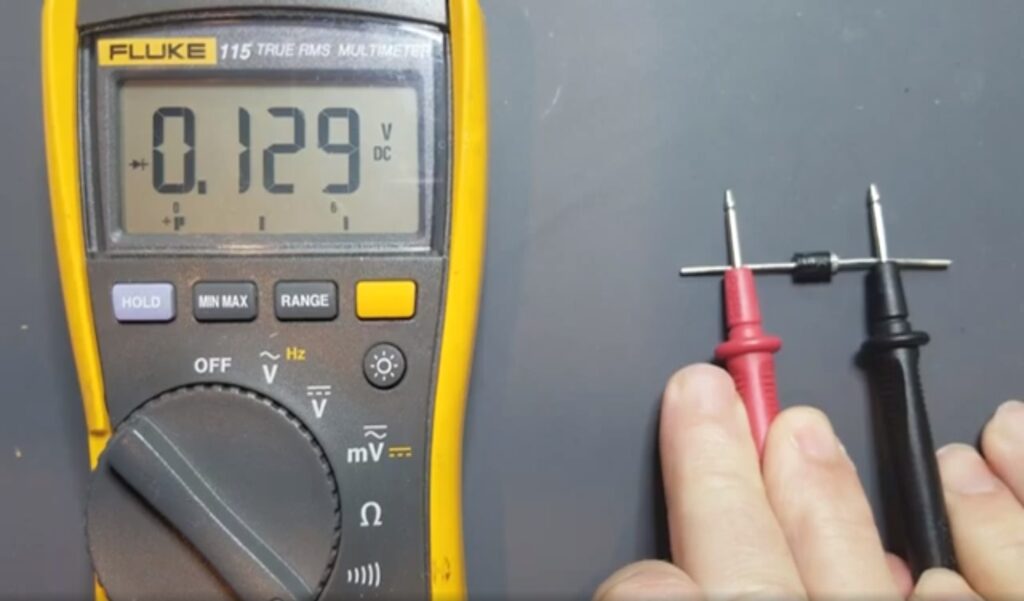
Place the red probe on the diode’s anode. Place the black probe on the cathode. The multimeter should display a voltage drop. Typically, this is between 0.6 to 0.7 volts for silicon diodes. A reading in this range indicates a functioning diode. If the multimeter shows “OL” or “1”, the diode may be faulty.
Conducting The Reverse Bias Test
Now, switch the probes. Connect the red probe to the cathode. Connect the black probe to the anode. The multimeter should read “OL” or “1”. This indicates no current flows in reverse. If a voltage drop appears, the diode is faulty. This step confirms the diode’s one-way current flow.
Interpreting Test Results
Interpreting test results is crucial for checking diode functionality. With a multimeter, understanding the readings determines if a diode is good or faulty. Knowing the difference helps in troubleshooting electronic circuits effectively. Let’s explore how to interpret these results.
Good Vs. Faulty Diodes
A good diode shows a low resistance in one direction. It blocks current in the opposite direction. This indicates the diode is functioning properly. A faulty diode might show high resistance in both directions. It may also conduct in both directions. This is a sign of damage. Recognizing these signs ensures proper circuit operation.
Common Errors And Solutions
Incorrect multimeter settings can lead to false results. Ensure the multimeter is set to diode mode. Misplacing the probes may show misleading readings. Always connect the red probe to the anode. Connect the black probe to the cathode. If the diode shows unusual results, check the multimeter battery. Low battery can affect the accuracy of readings. Verify the diode is not in-circuit while testing. Circuit interference can alter results.

Credit: www.electricaltechnology.org
Expert Tips For Accurate Testing
Testing diodes with a multimeter can seem tricky at first. Yet, with the right approach, you can get precise results. This section offers expert tips to ensure your diode testing is accurate and reliable. Whether you’re a beginner or experienced, these insights will guide you. They will help you avoid common pitfalls and enhance your testing skills.
Avoiding Common Mistakes
Many people forget to check the multimeter’s battery. A weak battery can lead to inaccurate readings. Always ensure the battery is fresh before testing. Another frequent error is not setting the multimeter to the correct mode. Set it to the diode test mode for accurate results.
Touching the diode’s leads with your fingers can also cause issues. The oils from your skin can affect the readings. Use tweezers or gloves to handle the diode. This ensures a clean connection and more reliable results.
Ensuring Reliable Measurements
Before testing, inspect the diode for physical damage. Cracks or burns can indicate it’s faulty. A visual check helps you avoid misdiagnosis. Also, always test the diode in both directions. This ensures it’s functioning correctly.
Use the correct probe polarity when testing. Connect the red probe to the anode and the black to the cathode. This ensures the multimeter gives an accurate forward voltage reading.
Lastly, calibrate your multimeter regularly. Calibration maintains its accuracy over time. This simple step ensures your measurements are always reliable.
Troubleshooting Diode Issues
Checking diodes with a multimeter involves setting the device to the diode test mode. Connect the multimeter leads to the diode terminals, ensuring correct polarity. A forward bias should show a voltage drop, while reverse bias indicates infinity or open circuit.
When dealing with electronics, diode issues can be a real headache. They might be small, but their role in controlling the flow of current is crucial. If a diode fails, it can disrupt the entire circuit. Knowing how to troubleshoot these issues can save you time and money. Let’s dive into the signs of diode failure and what to do when you encounter a faulty diode.
Signs Of Diode Failure
Diodes can fail in several ways, and recognizing the symptoms is the first step. One common sign is when the diode doesn’t conduct electricity in either direction. This usually indicates it’s open. Another sign is when the diode conducts in both directions. This suggests a short circuit, where the diode has lost its rectifying properties. You might also notice physical signs like discoloration or a burnt smell, which can indicate overheating. Consider the time my old radio stopped working. A quick check revealed a diode that was visibly damaged. Such clear signs can help you diagnose issues quickly.
Next Steps For Faulty Diodes
So, you’ve identified a faulty diode. What next? First, ensure the circuit is powered off to avoid any accidents. Safety first! Remove the faulty diode and replace it with a new one of the same type. Use your multimeter to confirm the new diode is working correctly. Set the multimeter to diode mode, and check for forward voltage drop. This should be around 0.6 to 0.7 volts for a silicon diode. If you’re unsure about how to replace the diode, consult the device’s manual. Don’t hesitate to seek professional help if needed. It’s better to ask for assistance than risk damaging the entire circuit. Does this sound familiar? Have you ever found yourself stuck with a faulty diode? Share your experiences in the comments below!
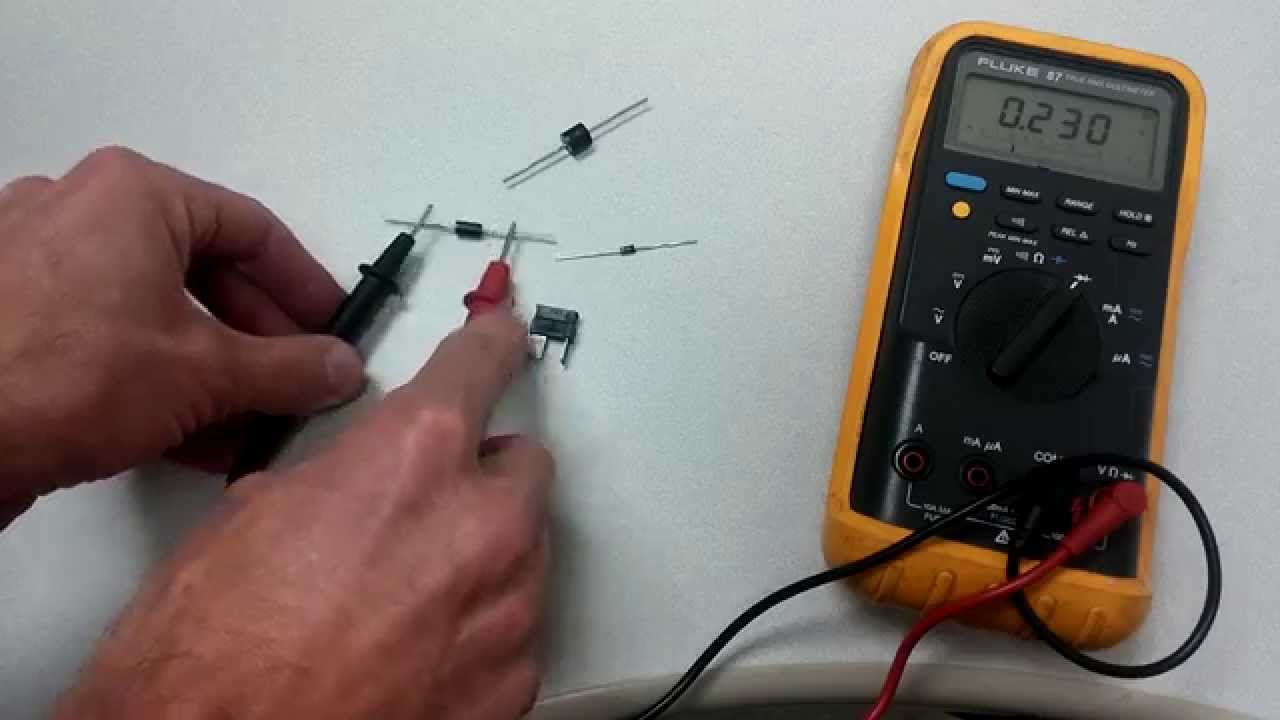
Credit: www.youtube.com
Frequently Asked Questions
How Do I Test A Diode With A Multimeter?
To test a diode with a multimeter, set the multimeter to diode mode. Connect the red lead to the diode’s anode and the black lead to the cathode. A typical forward bias reading is between 0. 5 to 0. 8 volts.
Reverse bias should show ‘OL’ or no reading.
What Multimeter Setting Is Used For Diodes?
Set the multimeter to the diode test mode. This mode allows you to check the forward voltage drop. It ensures the diode is functioning correctly. This setting is crucial for accurate diode testing.
Can I Check Diodes With A Digital Multimeter?
Yes, digital multimeters are ideal for checking diodes. They provide accurate readings in diode mode. Ensure the leads are connected correctly for precise results. Digital multimeters offer easy-to-read displays for diode testing.
Why Is My Diode Test Showing ‘ol’?
An ‘OL’ reading indicates the diode is reverse-biased or defective. Ensure leads are correctly connected. If forward-biased, the diode might be faulty. Double-check connections and retest the diode.
Conclusion
Checking diodes with a multimeter is simple and effective. Start by setting your multimeter to diode mode. Connect the probes correctly to the diode. Observe the reading on the display. A good diode shows a voltage drop in one direction.
No reading in reverse direction. Faulty diodes show no reading or zero in both directions. Practice these steps to ensure accurate results. Regular checks maintain your device performance. Keep your multimeter handy for quick troubleshooting. This skill is essential for anyone working with electronics.
Stay safe and follow all precautions. Happy testing!


