
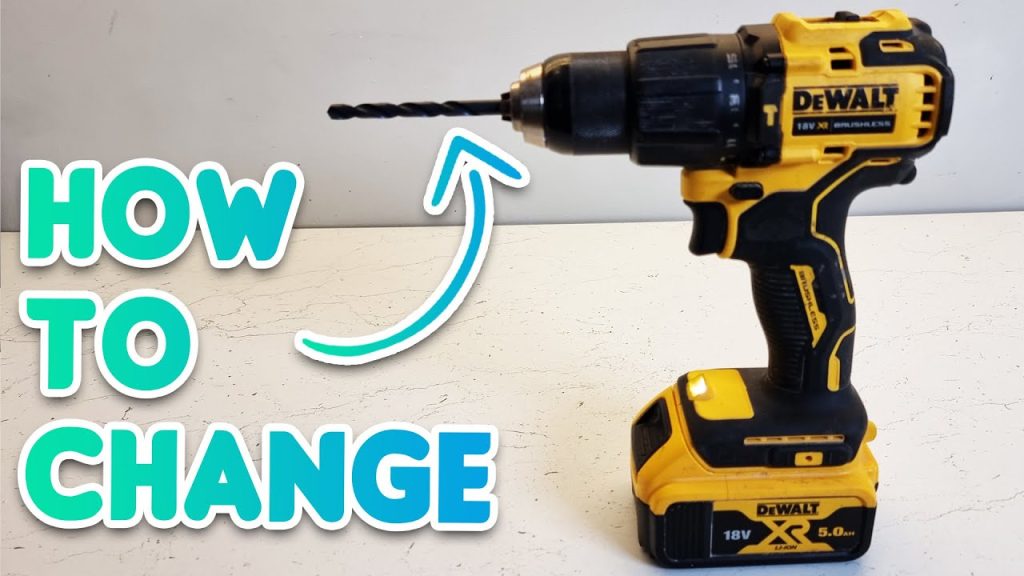
Ever found yourself in the middle of a project, ready to tackle the next step, only to be stopped in your tracks by the need to change your drill bit? You’re not alone.
Many DIY enthusiasts and professionals alike face this common hurdle. The good news is that changing a drill bit on a cordless drill is simpler than you might think. Understanding this process not only saves you time but boosts your confidence in handling your tools efficiently.
Imagine the satisfaction of seamlessly switching bits and getting back to work without a hitch. Dive into this guide, and you’ll discover how easy it is to master this essential skill, ensuring your projects run smoothly and effortlessly. Don’t let minor technicalities slow down your progress; let’s get started!

Credit: www.youtube.com
Gathering Necessary Tools
Start by gathering essential tools like a wrench or chuck key. Ensure a secure grip on the drill before proceeding. Organize these items within reach to streamline the bit change process.
Changing a drill bit on a cordless drill is a straightforward process, but having the right tools at your fingertips can make it even easier. Before you dive into the task, it’s crucial to ensure you’ve gathered everything you’ll need. This preparation saves you time and frustration, allowing for a smoother experience. Have you ever found yourself scurrying around, looking for tools in the middle of a project? Let’s avoid that! By the time you’re ready to change the drill bit, you’ll be equipped and confident.
Checklist For Success
Start by compiling a checklist. This is your roadmap. A proper checklist keeps you organized and focused. Make sure you have a firm grip on what you need. Have you ever tackled a project only to realize you’re missing that one crucial tool? A checklist prevents such hiccups.
Essentials To Gather
The essentials are simple but vital. You need your cordless drill, the new drill bit, and a chuck key if your drill requires one. These items are the backbone of your task. Imagine trying to change a drill bit without the bit itself or a chuck key—it’s like trying to bake a cake without flour!
Optional Accessories
While the basics are non-negotiable, consider some optional accessories. A pair of work gloves can protect your hands. A small brush can help clean the chuck area. These extras are not mandatory but can enhance your experience. Have you ever had a project go smoother because of one little extra tool you had on hand? These accessories might be your secret weapon.
Organizing Your Workspace
Organization is key. Arrange your tools neatly in your workspace. This setup minimizes distractions and maximizes efficiency. Do you find that a cluttered workspace hinders your productivity? A well-organized area could be your game-changer. Gathering the necessary tools is more than just a task; it’s setting the stage for success. Equip yourself wisely, and you’re halfway to mastering the art of changing a drill bit. How will you prepare for your next DIY adventure?
Safety Precautions
Ensure the drill is powered off before changing bits. Wear protective eyewear to shield against flying debris. Grip the drill firmly to prevent accidental slips.
Changing a drill bit on a cordless drill might seem like a straightforward task, but overlooking safety precautions can lead to accidents. Ensuring your safety and the safety of those around you is crucial. Taking a few moments to prepare can make all the difference in preventing unnecessary injuries.
Wear Protective Gear
Before you even pick up your drill, ensure you’re wearing the right protective gear. Safety goggles will protect your eyes from any flying debris. Gloves can help you maintain a firm grip and protect your hands from sharp edges. But don’t forget about your ears. If you’re working in a noisy environment, ear protection is also essential. Are you ready to prioritize your safety?
Power Off The Drill
Always make sure your drill is turned off before changing the bit. This might sound obvious, but it’s a step that’s often overlooked. You wouldn’t want the drill to accidentally start while your fingers are near the chuck. If your drill has a lock feature, use it. This extra step ensures that the drill won’t power on unexpectedly. Can you imagine the difference it makes?
Check For Loose Clothing
Loose clothing can be a hazard when working with power tools. Before you start, take a moment to check your clothing. Make sure sleeves or scarves are secured. Long hair should be tied back. Anything that can get caught in the drill should be addressed. Do you see how simple adjustments can prevent serious mishaps?
Use Proper Lighting
Good lighting is crucial when changing a drill bit. It allows you to see what you’re doing and reduces the risk of mistakes. If you’re in a dimly lit area, consider using a flashlight or moving to a better-lit space. Struggling to see can lead to improper installation of the bit. Have you ever tried working in poor lighting and noticed how much harder everything becomes?
Ensure A Stable Work Environment
Your workspace should be stable and free from clutter. A messy workspace can lead to trips and falls. Make sure your drill has a stable resting place when you’re not using it. Clear any unnecessary items from your workbench. Is your workspace ready to support your safety needs? By following these safety precautions, you can change your drill bit with confidence and peace of mind. Remember, safety isn’t just a step—it’s a mindset that protects you every time you work.
Powering Off The Drill
Powering off your cordless drill is the first crucial step. Safety comes first. Before changing the drill bit, it’s vital to ensure the drill is off. This prevents accidents and mishaps. Start by locating the power button. Most drills have this near the handle. Press it firmly to turn off the drill. Listen for a click or beep. This confirms the drill is off.
Removing the battery is equally important. Find the battery compartment at the base. Slide the battery out gently. This stops any power flow. Ensures complete safety. Now, your drill is ready for the next steps. Let’s move forward.
Locate The Power Button
The power button is usually at the handle’s top. It’s easy to spot. Look closely and press it. Confirm the drill is off by checking the light indicator. This step is vital for your safety.
Remove The Battery
Removing the battery adds an extra layer of safety. Find the battery compartment at the drill’s base. Slide the battery out carefully. This ensures no power is left in the drill. It’s now safe to proceed.
Check Power Status
Once the drill is off, verify the power status. Look for a light indicator on the drill. If the light is off, the drill is safe to handle. This step is crucial for peace of mind.

Credit: www.wikihow.com
Loosening The Chuck
Changing a drill bit on a cordless drill involves loosening the chuck. Start by gripping the chuck firmly, then rotate it counterclockwise. This action releases the current drill bit, allowing you to easily swap it for a new one.
Changing a drill bit on a cordless drill starts with loosening the chuck. The chuck holds the drill bit in place. It needs to be opened before inserting a new bit. This process is simple and quick. Understanding how to loosen the chuck is crucial for a smooth change.
Understanding The Chuck
The chuck is the part of the drill that grips the bit. It is usually located at the front. It is designed to hold bits securely. The chuck can be adjusted to different sizes. This allows you to use various drill bits.
Identify The Type Of Chuck
Cordless drills often have either keyless or keyed chucks. A keyless chuck can be loosened by hand. A keyed chuck needs a tool known as a chuck key. Knowing your chuck type helps in loosening it correctly.
Loosening The Chuck: Keyless
If your drill has a keyless chuck, use your hand to grip it. Turn the chuck counterclockwise. This action opens the chuck and releases the bit. You may need to use some force to loosen it.
Loosening The Chuck: Keyed
For a keyed chuck, find the chuck key. Insert the key into the hole on the side. Turn the key counterclockwise to loosen the chuck. This will allow the bit to be removed.
Ensure Safety First
Before loosening the chuck, ensure the drill is off. Remove any power source if necessary. Safety prevents accidents during the bit change process.
Check The Chuck’s Grip
Once the chuck is loosened, check its grip. Make sure it opens wide enough for the new bit. A properly adjusted chuck ensures a secure fit for the new drill bit.
Removing The Old Drill Bit
Changing a drill bit is often necessary for different tasks. Knowing how to remove the old drill bit is the first step. It ensures the drill is ready for new challenges. This process is simple but requires attention to detail.
Identify The Chuck Type
First, identify the chuck type on your cordless drill. Most drills have a keyless chuck or a keyed chuck. Recognizing the chuck type is crucial. It helps you proceed correctly with the removal.
Release The Chuck
If your drill has a keyless chuck, grip it firmly. Rotate the chuck counterclockwise to loosen it. This rotation will release the grip on the drill bit. For a keyed chuck, insert the chuck key and turn counterclockwise.
Remove The Drill Bit
Once the chuck is loose, gently pull out the old drill bit. Ensure you pull straight to avoid bending. The drill bit should slide out easily. If it resists, check the chuck again.
Check For Debris
Inspect the chuck for any debris or dust. Clean the chuck area if necessary. This ensures a smooth fit for the new drill bit. Keeping the chuck clean prevents future issues.
Secure The Drill
Place your drill on a stable surface. This prevents accidental dropping or damage. A secure drill is easier to handle. It also ensures safety during the process.
Inserting A New Drill Bit
Changing a drill bit on a cordless drill is simple. Inserting a new drill bit requires careful steps. Follow these steps to ensure it’s done right.
Step 1: Open The Chuck
First, hold the drill firmly. Turn the chuck counterclockwise. This will open the jaws of the chuck. Make sure the chuck is wide enough for the new bit.
Step 2: Insert The Drill Bit
Choose the correct size bit for your task. Insert the smooth end into the chuck. Push it in as far as it will go.
Step 3: Tighten The Chuck
Turn the chuck clockwise by hand. Ensure it grips the bit firmly. Some drills have a key to tighten further. Use it if needed for a secure fit.
Step 4: Test The Drill Bit
Turn the drill on briefly. Check if the bit spins correctly. A wobbly bit needs more tightening. Make adjustments as necessary for safety.
Step 5: Secure The Drill
Check again that the bit is secure. Hold the drill in the work position. You’re now ready to begin drilling.
Securing The Drill Bit
Securing the drill bit is a crucial step in using your cordless drill. It ensures the bit stays in place during operation. A secure bit leads to precise and safe drilling.
Understanding The Chuck Mechanism
The chuck holds the drill bit in place. Most cordless drills have keyless chucks. These allow quick and easy bit changes without tools. Familiarize yourself with your drill’s chuck type.
To insert a new bit, first loosen the chuck. Hold the drill in one hand. Use your other hand to rotate the chuck counterclockwise. This opens the jaws of the chuck.
Inserting The Drill Bit
With the chuck open, insert the new drill bit. Slide it straight into the chuck. Ensure it is centered and sits evenly between the jaws.
Tightening The Chuck
Hold the drill steady. Rotate the chuck clockwise to tighten. This grips the bit securely. Ensure the bit is firm and does not wobble.
Testing The Bit’s Security
After tightening, check the bit’s security. Gently tug on the bit to confirm it is secure. If it moves, tighten the chuck more. Repeat the test until the bit is secure.
Testing The Installation
Changing a drill bit on a cordless drill involves simple steps. First, ensure the drill is off and battery removed. Next, loosen the chuck by turning it counterclockwise, insert the new bit, and tighten securely. Testing the installation ensures the bit is properly secured, preventing accidents during use.
Testing the installation of a new drill bit in your cordless drill is crucial to ensure safety and efficiency. You’ve gone through the process of changing the bit, but how do you know it’s secure? A loose drill bit can lead to inaccurate drilling and potential hazards. Let’s walk through some simple steps to verify your installation.
Check For A Secure Fit
Before you begin testing, ensure the bit is tightly secured. Hold the drill and gently tug on the bit. If it moves or feels loose, adjust the chuck. A secure fit is essential for precise drilling and prevents the bit from slipping during use.
Conduct A Visual Inspection
Take a moment to visually inspect the drill bit. Look for any signs of wear or damage. Even slight imperfections can affect performance. Observing the bit closely can prevent future mishaps and improve drilling accuracy.
Perform A Test Drill
Grab a scrap piece of wood or material similar to your project. Drill a small hole to test the bit’s installation. Listen for unusual sounds like clicking or grinding. These can indicate a problem with the fit or the bit itself.
Evaluate The Drilling Outcome
Once you’ve drilled the test hole, evaluate the result. A clean, precise hole means everything is working correctly. If the hole is rough or skewed, reassess the bit’s installation and condition. Your drill should make your work easier, not harder.
Reflect On Personal Experience
Think back to a time when a poorly installed drill bit caused frustration or delays. Learn from these moments. Ensuring the bit is properly secured can save you time and prevent errors in your projects. Are you taking the necessary steps to check your drill bits? Testing your installation isn’t just a step in the process; it’s your assurance of a job well done.
Maintenance Tips
Maintaining your cordless drill is crucial for ensuring its longevity and efficiency. By taking care of it, you save money and time in the long run. Plus, you’ll avoid those frustrating moments when a neglected tool fails just when you need it most. Here are some simple yet effective tips to keep your drill in top shape.
Regular Cleaning
Dust and debris can accumulate in your drill over time. Wipe down the exterior with a damp cloth after use. Use a small brush to clean the vents and chuck. This prevents overheating and keeps your drill running smoothly.
Check The Battery
Ensure your battery is always charged and in good condition. A weak battery can reduce performance. Store it in a cool, dry place to extend its life. If your drill starts losing power quickly, consider replacing the battery.
Lubrication
Proper lubrication is essential for your drill’s moving parts. Apply a drop of oil on the chuck to keep it flexible. If you hear unusual sounds while operating, it might be time for a check-up. Regular lubrication prevents rust and wear.
Inspect The Drill Bit
Drill bits wear out and become dull. Check them regularly and replace when necessary. A sharp bit ensures clean and precise holes. Keep a variety of bits handy for different tasks. How often do you check your drill bits?
Tighten Loose Parts
Vibration can loosen screws and other components over time. Regularly inspect your drill for loose parts. Tighten them as needed to maintain stability. A well-maintained drill reduces the risk of accidents.
Storage
Store your drill in a dry place away from direct sunlight. Use a protective case to prevent dust accumulation. Proper storage prolongs the lifespan of your tool. Do you have a designated space for your drill?
By integrating these maintenance tips into your routine, you ensure your cordless drill remains a reliable partner in your projects. Take a few minutes after each use to care for your tool, and you’ll notice the difference. Share your experiences or tips in the comments below!

Credit: www.tiktok.com
Frequently Asked Questions
How Do You Remove A Drill Bit On A Cordless Drill?
To remove a drill bit from a cordless drill, first ensure the drill is off. Then, rotate the chuck counterclockwise to loosen it. Hold the bit and continue turning until it’s free. Securely tighten the chuck clockwise after inserting a new bit.
Always check the drill is locked before use.
How Do I Change The Bit On A Drill?
Turn off and unplug the drill. Hold the chuck and rotate it counterclockwise to loosen. Remove the old bit. Insert the new bit into the chuck. Tighten the chuck by rotating it clockwise. Ensure the bit is secure before using the drill again.
How Do I Get My Drill To Release The Bit?
Turn off the drill and ensure it’s unplugged. Hold the chuck and rotate it counterclockwise to release the bit. If it’s stuck, use a wrench for leverage. Once loose, remove the bit carefully. Always follow safety precautions during this process.
How To Put A Different Bit On A Drill?
To change a drill bit, first loosen the chuck by turning it counterclockwise. Remove the old bit and insert the new one. Tighten the chuck by turning it clockwise to secure the bit. Ensure it’s firmly in place before use.
Always unplug the drill before changing bits for safety.
Conclusion
Changing a drill bit on a cordless drill is simple. Just follow these steps. Loosen the chuck, remove the old bit, and insert the new one. Tighten the chuck securely, and you’re set to go. Practice makes it easier each time.
Always ensure safety by disconnecting power before changing bits. With a little patience, anyone can do it. This basic skill enhances your DIY projects. So, grab your drill and start exploring new possibilities. Happy drilling!


