
Have you ever found yourself in a situation where your 24V vehicle battery suddenly dies, leaving you stranded and frustrated? It’s a common problem, but the solution might be closer than you think.
Imagine being able to jump start your 24V vehicle using a 12V battery, a trick that could save you time, stress, and money. You might be wondering if this is even possible. The good news is that it is! Understanding how to safely and effectively jump start a 24V system with a 12V battery can be a game changer.
This isn’t just another “how-to” guide; it’s a secret weapon for your roadside toolkit. Keep reading to unlock the steps and insights you need to turn your battery woes into a thing of the past, and gain the confidence to handle this challenge with ease.
Credit: www.youtube.com
Safety Precautions
Jumping a 24V system with a 12V requires careful attention to safety. Ensure proper connection of jumper cables to avoid sparks. Always check for compatibility to prevent battery damage.
Jump-starting a 24V system with a 12V battery is not your typical car maintenance task. It requires extra caution to ensure both your safety and the integrity of your vehicle’s electrical system. Proper safety precautions can mean the difference between a successful jump-start and costly damages or injuries. Let’s delve into some key safety measures you should always keep in mind.
Protective Gear
Wearing the right protective gear is crucial. Always wear gloves to protect your hands from potential sparks or battery acid. Safety goggles are also essential to shield your eyes from any unexpected splashes or debris. Think about the last time you underestimated a simple task and got a minor injury. A similar mindset during a jump-start can lead to significant harm. Always prioritize safety over convenience.
Workspace Safety
Your workspace needs to be clear and stable. Ensure the vehicle is on a flat surface and the brakes are securely applied. This prevents any unintended movements that could lead to accidents. Keep the area around the batteries free from any flammable materials. Sparks can ignite these substances, causing fires. Do you have a fire extinguisher nearby? It’s a handy precaution that many overlook. Avoid performing the jump-start in wet or damp conditions. Water conducts electricity and increases the risk of shocks or short circuits. Always check the weather and choose a safe environment for your task. By following these safety precautions, you not only protect yourself but also maintain the reliability of your vehicle. Have you ever had a close call because you skipped a safety step? Such experiences remind us of the importance of these seemingly small details.
Tools And Equipment
Jump-starting a 24V system using a 12V battery requires specific tools. Proper equipment ensures safety and efficiency. Knowing what you need is crucial.
Essential Tools
First, secure a reliable pair of jumper cables. They should support high voltage. Length matters, as well as quality. Choose cables with durable insulation. They prevent short circuits.
A multimeter is vital. It checks voltage levels accurately. Avoid guessing; use it to measure battery voltage. Confirm you connect correctly.
Recommended Equipment
A jump starter pack helps. It must handle 24V systems. Some models support both 12V and 24V. This versatility is beneficial. Verify its specifications before use.
Safety goggles protect your eyes. Sparks may fly during connection. Wear gloves to prevent shocks. They offer extra insulation.
Have a battery charger on hand. It recharges the 12V battery afterward. Choose a charger with adjustable settings. This flexibility is useful.
Understanding Voltage Differences
Understanding voltage differences is crucial for jump-starting vehicles. Voltage refers to the electrical force that drives current through a circuit. Different vehicles require different voltage systems for optimal performance. Jump-starting a 24V system with a 12V source involves understanding these differences. Let’s explore how these voltage systems work and their effects on jump-starting.
12v Vs 24v Systems
12V systems are common in smaller vehicles. They include cars and motorcycles. These systems use a lower electrical force. This is suitable for light-duty applications. 24V systems are found in larger vehicles. Trucks and buses often use them. These systems provide more power for heavy-duty tasks. Understanding each system helps in jump-starting processes.
Effects On Jump Starting
Using a 12V source to jump-start a 24V system can be challenging. The voltage mismatch affects the process. A 12V battery may not provide enough power. This can lead to incomplete jump-starting. Connecting mismatched systems could cause damage. It may harm both the battery and electrical components. Proper technique and tools are essential for safe jump-starting.
Preparing The Vehicle
Preparing the vehicle before jump-starting is crucial. It ensures safety and effectiveness. Start by assessing the condition of both vehicles involved. This step lays the foundation for a smooth process.
Checking Battery Condition
First, inspect the battery of the vehicle that needs a jump. Look for any visible damage. Check for corrosion on the terminals. A clean battery ensures better connections. If the battery is swollen, do not proceed. A damaged battery can pose safety risks.
Identifying Connection Points
Locate the battery terminals on both vehicles. The positive terminal is usually marked with a plus sign (+). The negative terminal is marked with a minus sign (-). It’s crucial to identify these correctly. Incorrect connections can cause damage or hazards. Make sure the connections are accessible and clean.
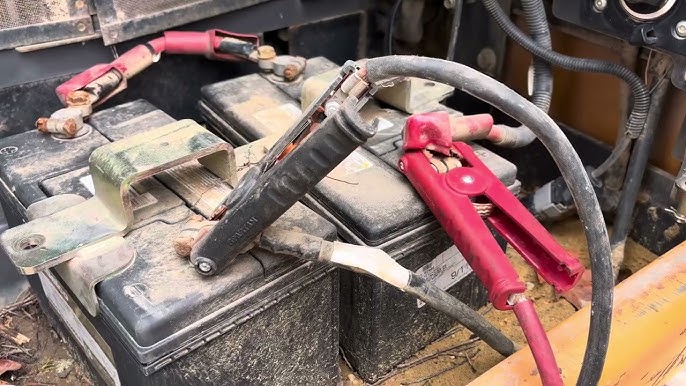
Connecting Batteries
Jump starting a 24V system with a 12V battery involves connecting batteries in series. First, attach the positive cable from the 12V battery to the positive terminal of the 24V system. Next, connect the negative cable to the ground of the 24V system.
Ensure connections are secure and use caution to prevent short circuits.
Connecting batteries might seem like a daunting task, especially when you’re trying to jump start a 24V system with a 12V battery. But with the right steps and precautions, it’s entirely doable. Whether you’re stuck in a remote area with limited resources or just trying to make the most of what you have, understanding how to safely connect these batteries can be a lifesaver. Ready to learn the ropes? Let’s dive into the details.
Step-by-step Connection
Begin by ensuring both batteries are disconnected from their respective devices. This prevents any accidental surges during the process. Next, position the batteries close enough to each other so that your jumper cables can reach comfortably. Keep a close eye on the positive and negative terminals. Connect the positive terminal of the 12V battery to the positive terminal of the 24V system. Then, connect the negative terminal of the 12V battery to the negative terminal of the 24V system. Always connect positive to positive and negative to negative. Here’s a tip from personal experience: double-check the connections before proceeding. A quick glance can save you from costly mistakes.
Avoiding Common Mistakes
Never connect the batteries without checking their voltages first. A mismatch can lead to severe damage. Avoid using cables that are too thin or worn out. They might not handle the current efficiently and could overheat. Stay clear of connecting the batteries in parallel. You’re aiming for a series connection here to boost the voltage, not the current. Remember the time when my friend ignored these basics and ended up with a fried circuit board? Learn from others’ mishaps and be cautious. Are you aware of the risks of ignoring battery polarity? It’s a common oversight that can lead to dangerous consequences. Always double-check before you proceed. By understanding these steps and potential pitfalls, you can confidently jump start your 24V system with a 12V battery. Ready to tackle your next battery challenge with ease?
Credit: www.redarcelectronics.com
Starting The Engine
Starting a 24V engine with a 12V battery may seem tricky. Yet, it is possible with care and precision. Understanding the right steps ensures a safe start. This process requires patience and attention to detail. Follow the guidelines for a successful engine start.
Proper Start-up Procedure
Begin by ensuring all safety precautions are in place. Connect the positive terminal of the 12V battery to the positive of one 24V battery. Then, connect the negative terminal to the negative of the other 24V battery. This series connection creates a 24V link using two 12V connections. Double-check all cables and connections for security and accuracy.
Use quality jumper cables designed for higher voltage. Turn off all unnecessary electronic components in the vehicle. This includes lights, radio, and air conditioning. Ensure the vehicle is in neutral or park, with the parking brake engaged. Now, attempt to start the engine. Listen carefully for any unusual sounds. If the engine does not start, wait a minute and try again.
Monitoring Engine Performance
After the engine starts, monitor its performance closely. Listen for irregular noises or vibrations. Check the dashboard for warning lights. These indicate issues that need attention. Keep the engine running for a few minutes to stabilize. Observe the battery voltage using a voltmeter. It should maintain a steady reading without fluctuations.
Pay attention to the temperature gauge. Ensure it stays within normal operating range. Check the alternator to confirm it’s charging the batteries effectively. If problems persist, consult a professional mechanic. Regular monitoring ensures the engine runs smoothly and efficiently.
Troubleshooting Issues
Encountering problems while jump starting a 24V system with a 12V source can be frustrating. Understanding common issues helps in resolving them efficiently. Addressing these challenges ensures a smooth jump-start process.
Common Problems
Some issues arise frequently during jump-starting. Incorrect connections are a leading problem. This often results in no power transfer. Another issue is using incompatible cables. Thin cables fail to carry enough current. Weak battery conditions also cause trouble. Old or damaged batteries may not hold a charge.
Solutions And Fixes
Ensure connections are correct. Attach red cables to positive terminals. Black cables should connect to negative points. Use suitable cables for the task. Thicker cables support better current flow. Inspect battery conditions beforehand. Replace old or faulty batteries if needed. This ensures a reliable jump-start every time.
Credit: forum.ih8mud.com
Maintenance Tips
Maintaining your vehicle’s battery is crucial for its longevity and performance. Proper care can prevent unexpected breakdowns and ensure your battery remains efficient. Below are some essential maintenance tips to keep your battery in top shape.
Battery Care
Keep your battery clean and free from corrosion. Dirt and corrosion can affect its efficiency. Use a mixture of baking soda and water to clean terminals. Ensure connections are tight and secure. Avoid using metal tools directly on battery terminals. They can cause sparks or damage. Store your vehicle in a cool, dry place to protect the battery.
Regular Checks
Check your battery’s charge regularly. Use a voltmeter to measure voltage. A healthy battery should read around 12.6 volts. Inspect for signs of wear or damage. Look for bulging or leaks in the battery casing. Test your battery with a load tester at least once a year. This helps identify potential issues early. Regular checks ensure your battery performs optimally.
Frequently Asked Questions
Can I Jump Start A 24 Volt With A 12 Volt?
Jump-starting a 24-volt system with a 12-volt battery is risky and not recommended. It can damage electronics and cause safety hazards. Always use a compatible 24-volt source for jump-starting. Consult a professional for guidance or alternatives to avoid potential damage or accidents.
How Do You Jump Start 24v?
To jump start a 24V system, connect two 12V batteries in series. Attach positive to positive and negative to negative terminals. Use jumper cables to connect the donor vehicle’s battery to the dead battery. Ensure connections are secure before starting.
Always follow safety precautions and consult the vehicle’s manual.
Can You Charge A 24 V System With A 12 V?
You cannot charge a 24V system with a 12V charger. It requires a 24V charger for effective charging. Using a 12V charger can damage the system and is unsafe. Always match the charger’s voltage with the system’s voltage for safe operation.
How To Hook Up 24 Volt With 2 12 Volt Batteries?
Connect the positive terminal of the first 12-volt battery to the negative terminal of the second. Then, link the remaining positive and negative terminals to your device. This series connection creates a 24-volt output. Always ensure proper polarity and secure connections for safety.
Conclusion
Jump starting a 24V system with a 12V battery needs caution. Ensure safety gear is worn. Follow step-by-step instructions closely. Always double-check connections to avoid damage. Start by connecting the batteries properly. Monitor the process to prevent mishaps. Patience and attention are crucial throughout.
After jump starting, test the system thoroughly. This ensures everything works fine. Remember, safety should always come first. If unsure, seek professional help. Proper knowledge helps avoid costly mistakes. Now, you’re ready to handle this task safely. Always approach with care for best results.


