
Have you ever found yourself in need of a quick and easy way to water your garden, but all the outdoor faucets seem out of reach or simply don’t exist? You’re not alone.
Many homeowners face the dilemma of wanting to use their garden hose without a convenient outdoor water source. Luckily, there’s a simple solution right inside your home: your kitchen faucet. Imagine the ease of watering your plants, washing your car, or even filling a kiddie pool, all with the power of your kitchen sink.
It’s possible, and it’s easier than you might think! By learning how to attach a garden hose to your kitchen faucet, you’ll unlock a world of convenience and efficiency. In this guide, you’ll discover step-by-step instructions that will transform your kitchen faucet into a versatile tool for all your watering needs. No more struggling with heavy watering cans or inconvenient outdoor setups. This method is straightforward, cost-effective, and perfect for anyone looking to streamline their gardening tasks. Get ready to explore a hassle-free approach that will save you time and effort. Keep reading to uncover how you can effortlessly connect your garden hose to your kitchen faucet and revolutionize your gardening experience.
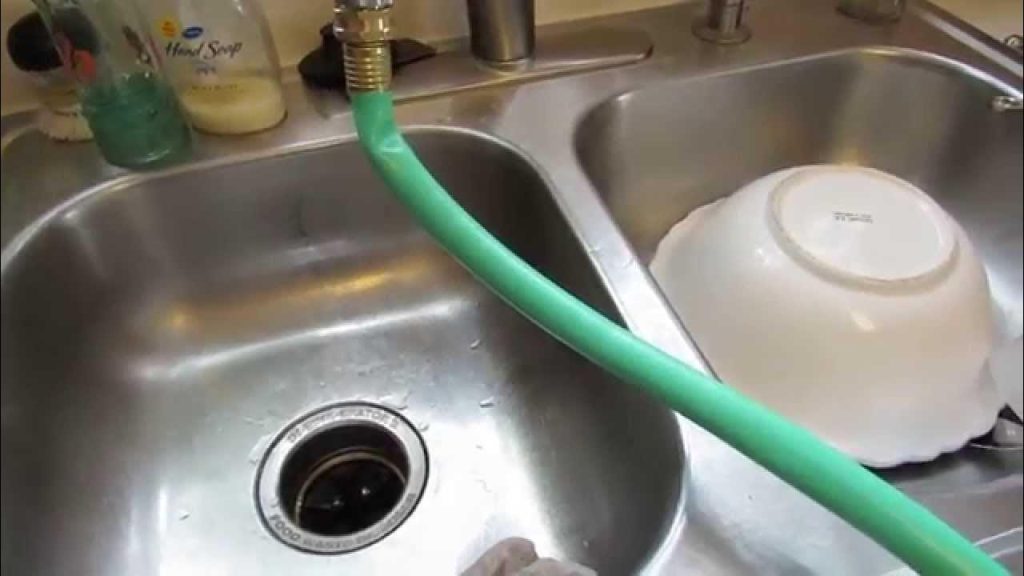
Credit: www.youtube.com
Tools And Materials Needed
Connecting a garden hose to your kitchen faucet might seem complicated. But with the right tools and materials, it’s a straightforward task. This guide will walk you through the essentials, ensuring a smooth attachment process.
Tools Required
Start with a good adjustable wrench. It helps in tightening connections securely. Have a screwdriver handy. Some faucets may have screws that need adjusting. A pair of pliers can also be useful. They assist in gripping and turning stubborn connections.
Materials Needed
The most important item is a faucet adapter. Choose one that fits your faucet type. A garden hose with the appropriate fittings is essential. Ensure the hose is long enough for your needs. You may also need a rubber washer. It creates a watertight seal, preventing leaks.
Optional Supplies
Consider using Teflon tape. It wraps around threads to prevent leaks. A bucket or towel can be helpful. It catches any water spills during the process. Have a cleaning cloth handy. It’s useful for wiping any spills or drips.
Preparing The Faucet
Connecting a garden hose to a kitchen faucet requires an adapter. Ensure the adapter fits securely onto the faucet. Attach the hose firmly to the adapter for a leak-free connection.
Preparing your kitchen faucet is the first step in attaching a garden hose. Proper preparation ensures a snug fit and a leak-free connection. This process involves a few simple tasks. Let’s dive into the details.
Remove Aerator
Start by removing the aerator from your kitchen faucet. The aerator is the small screen at the faucet’s end. Use pliers or your hands to unscrew it. Be gentle to avoid damaging the threads. Once removed, clean any debris or mineral deposits. This ensures a smooth connection later.
Check Thread Compatibility
Next, check the faucet’s threads for compatibility with the hose adapter. Most kitchen faucets have either male or female threads. Match these with the correct adapter. Use a thread gauge if unsure about the size. Proper compatibility prevents leaks and ensures a tight fit. This step is crucial for a successful attachment. By following these steps, you prepare the faucet effectively. This makes attaching your garden hose simple and efficient.
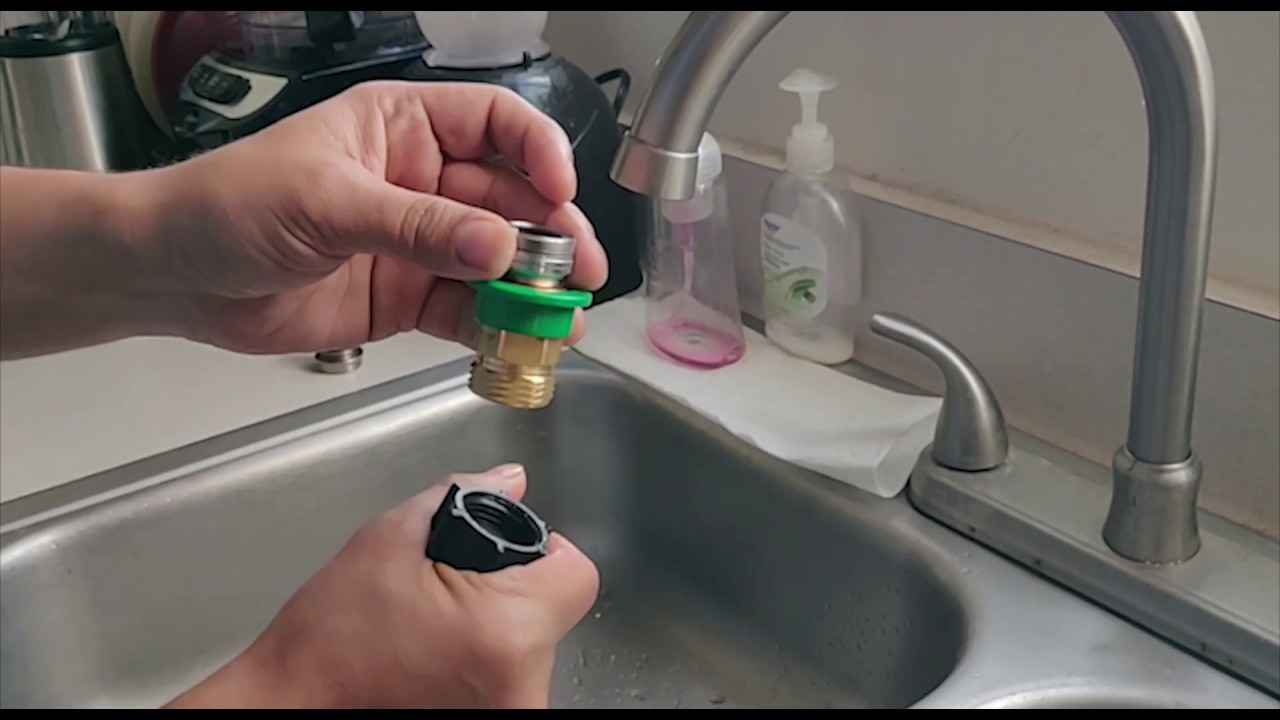
Choosing The Right Adapter
Attaching a garden hose to your kitchen faucet seems challenging. Choosing the right adapter simplifies the task. An appropriate adapter ensures a snug fit, preventing leaks. Select wisely to avoid frustration during gardening chores.
Types Of Adapters
Not all adapters fit every faucet. Universal adapters fit most standard faucets. Threaded adapters need specific fittings. Quick-release adapters offer easy connection. Snap-on adapters ensure fast attachment. Each type serves a different purpose.
Where To Find Adapters
Local hardware stores stock various adapters. Online marketplaces offer extensive choices. Specialty garden centers provide expert advice. Consider reading reviews before purchasing. Compare prices for the best deal. Ensure compatibility with your faucet.
Attaching The Hose
Connecting a garden hose to a kitchen faucet is straightforward. Use a faucet adapter for easy attachment. Ensure a snug fit to prevent leaks.
Attaching a garden hose to a kitchen faucet may seem tricky. But it’s straightforward with the right tools and steps. This guide will help you through the process. You’ll need an adapter and a garden hose. Follow these steps to ensure a proper connection.
Securing The Adapter
First, locate a suitable adapter for your faucet. Ensure it fits snugly. Remove the faucet aerator by twisting it counterclockwise. Clean any debris from the faucet threads. Attach the adapter by screwing it on tightly. Use a wrench if necessary. Check that it’s secure and doesn’t wobble.
Connecting The Hose
Now, connect the garden hose to the adapter. Align the hose end with the adapter threads. Twist the hose clockwise until secure. Avoid over-tightening to prevent damage. Turn on the water gently. Check for leaks around the connection. Tighten further if water leaks. Your hose should now be attached and ready for use.
Testing The Connection
Connecting a garden hose to your kitchen faucet is simple. Use a faucet adapter to fit the hose snugly. Ensure the connection is secure to prevent leaks.
After you’ve successfully attached your garden hose to the kitchen faucet, the next crucial step is testing the connection. You wouldn’t want to discover leaks or issues midway through watering your plants. Ensuring a secure fit can save you from unwanted surprises and potential water damage. Here’s how you can test the connection effectively.
Check For Leaks
Turn on the faucet gently and observe the connection point. Look closely for any water droplets or streams that might indicate a leak. If you spot any leakage, try tightening the adapter or hose. A friend’s experience with a leaky hose taught me the importance of patience. Rushing often leads to overlooked issues. Are you seeing any leaks? Consider replacing the washer inside the hose adapter for a snug fit.
Adjusting Water Flow
Once the connection is secure, it’s time to adjust the water flow. Start with a slow flow to ensure the hose doesn’t pop off or cause splattering. Gradually increase the water pressure to find the optimal flow for your needs. Picture this: you’re in a hurry and crank the faucet open. The hose flies off, soaking everything in sight. Not ideal, right? What water pressure works best for you? It might vary depending on what you’re using the hose for. Remember, adjusting water flow is not just about avoiding a mess; it’s about using water efficiently. Testing the connection is a simple yet essential step. It’s all about protecting your home while maximizing your gardening efforts. What tricks do you use to ensure a secure hose connection?
Troubleshooting Common Issues
Attaching a garden hose to a kitchen faucet can be tricky. Use an adapter for a secure fit. Ensure a tight seal to prevent leaks.
Attaching a garden hose to your kitchen faucet might sound like a straightforward task. Yet, many find themselves facing unexpected challenges. Let’s tackle some common issues you might encounter during this process. These insights will help you turn potential headaches into simple fixes.
Leakage Problems
Leaks are a common issue when attaching hoses to faucets. First, ensure your adapter is tightly secured to the faucet. A loose connection is often the culprit behind leaks. Check the rubber washer inside the adapter. If it’s worn out or missing, it can cause water to seep through the connection. Replace it for a snug fit. Sometimes, the threads on the adapter or faucet might have debris. Clean them thoroughly to ensure a tight seal. Have you ever noticed how a small piece of dirt can ruin a perfect connection?
Adapter Fit Issues
Not all adapters fit every faucet. It’s crucial to find one that matches your faucet’s threading. Measure the diameter of your faucet to ensure compatibility before purchasing an adapter. Some faucets have unique designs that require special adapters. If you have a fancy faucet, you might need to search a bit more for the right match. When the adapter seems to fit but doesn’t stay put, it might be due to incompatible threading. Double-check the threading type (male or female) to ensure a proper fit. Have you ever tried forcing a square peg into a round hole? In each of these scenarios, patience and attention to detail are your best tools. Solving these common problems can make your garden hose attachment process smooth and efficient. Have you faced any of these challenges before? How did you overcome them?
Maintenance Tips
Connecting a garden hose to a kitchen faucet requires a simple adapter. First, remove the faucet’s aerator. Next, attach the adapter to the faucet, ensuring a snug fit. Finally, connect the garden hose to the adapter. This setup allows you to easily water plants or clean outdoor areas using indoor water sources.
Maintaining your garden hose and kitchen faucet adapter is crucial to ensuring a long lifespan and efficient use. Have you ever found your adapter leaking or clogged after just a few uses? Regular maintenance can prevent these issues. Here are some practical tips to keep your setup in top condition.
Cleaning The Adapter
Keeping the adapter clean is essential for a seamless connection. After each use, rinse the adapter with warm water to remove any dirt or debris. Occasionally, use a brush to scrub away any mineral buildup, especially if your area has hard water. You might find it useful to soak the adapter in a vinegar solution once a month. This helps dissolve any stubborn deposits. A clean adapter ensures a tight seal and prevents leaks.
Storage Suggestions
Proper storage of your hose and adapter can prevent damage and extend their lifespan. When not in use, detach the hose from the faucet and drain any remaining water. Store the hose in a cool, dry place to avoid sun damage and cracking. Consider hanging the hose on a reel or hook to prevent kinks. The adapter should be stored in a small container or bag to protect it from dust and accidental damage. Do you have a designated spot for your garden tools? Keeping everything organized makes it easier to find and use them next time. By following these maintenance tips, you can enjoy a hassle-free experience each time you water your garden. Regular cleaning and proper storage will save you time and money in the long run. What maintenance habits will you start implementing today?

Credit: www.reddit.com
Frequently Asked Questions
How Do You Connect A Hose To A Kitchen Faucet?
To connect a hose, use a faucet adapter. First, remove the aerator from the faucet. Attach the adapter and ensure it’s tight. Connect the hose to the adapter. Check for leaks and secure the connection. This allows you to use your kitchen faucet for gardening needs.
Can All Kitchen Faucets Attach To A Hose?
Not all faucets are compatible with hoses. Older models may lack threading for adapters. Check your faucet type before purchasing an adapter. Modern faucets often accommodate adapters, making it easier to attach hoses. If unsure, consult your faucet’s manual or a hardware specialist.
What Tools Do I Need For Attachment?
You’ll need a faucet adapter and pliers. The adapter connects the hose to the faucet. Pliers help tighten connections, preventing leaks. Ensure you have the correct adapter for your faucet. This simple setup requires minimal tools and time, making it convenient for homeowners.
Is It Safe To Use A Garden Hose Indoors?
Using a garden hose indoors can be safe with precautions. Ensure all connections are tight to prevent leaks. Monitor water pressure to avoid spills. Regularly check for wear and tear on the hose. Proper maintenance ensures safe indoor use without damaging your kitchen.
Conclusion
Attaching a garden hose to your kitchen faucet is easy. Follow simple steps, and you’re done. Start by gathering the right adapter. This helps connect the hose securely. Ensure you twist firmly to prevent leaks. Test the connection by turning on the tap slowly.
Check for any drips or loose fittings. Adjust if necessary. Now, you can water plants directly from your kitchen. This method saves time and effort. It’s a practical solution for indoor watering needs. Enjoy the convenience of using your kitchen faucet effectively.
Happy gardening!


